You’ve had sushi. You’ve had Oreos. But you’ve probably never had both in the same bite.
Oreo sushi is one of those recipes that looks like you spent hours in the kitchen when you actually didn’t. It’s creamy, chocolatey, made with just a handful of ingredients, and people lose their minds over it at parties.
And no, there’s no raw fish involved. 😄
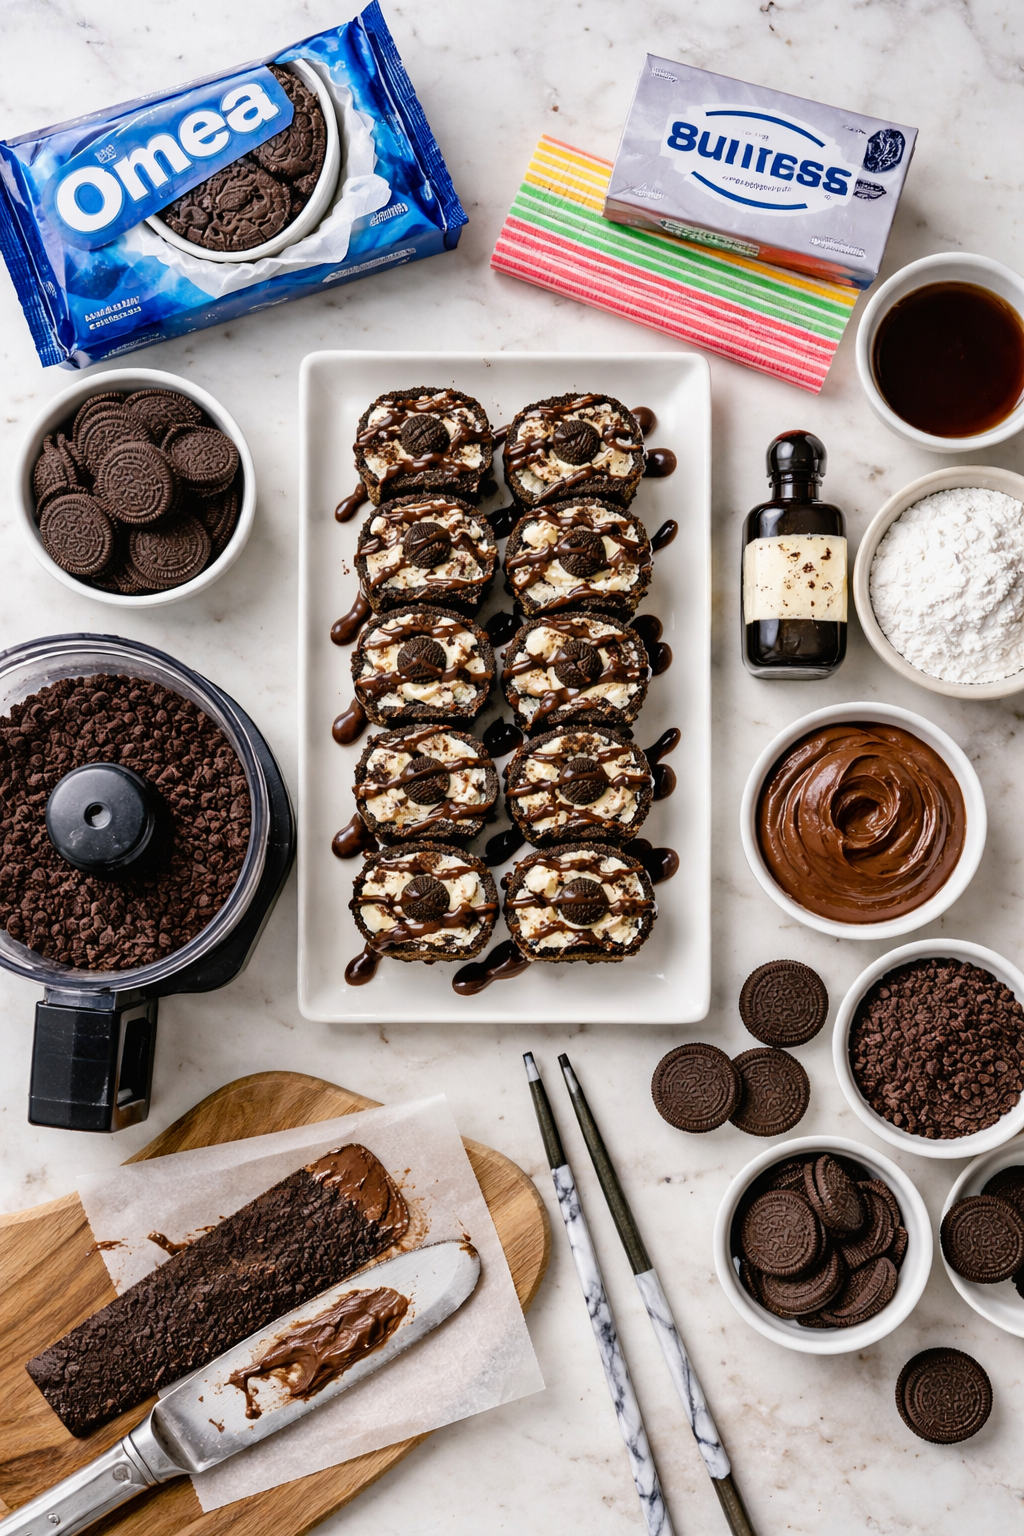
It’s basically a rice crispy-style Oreo roll sliced into rounds that look exactly like sushi. Guests always do a double-take. Kids go absolutely crazy for it. Adults aren’t far behind.
If you’ve been looking for a crowd-pleaser that requires zero baking and minimal cleanup, you’ve found it.
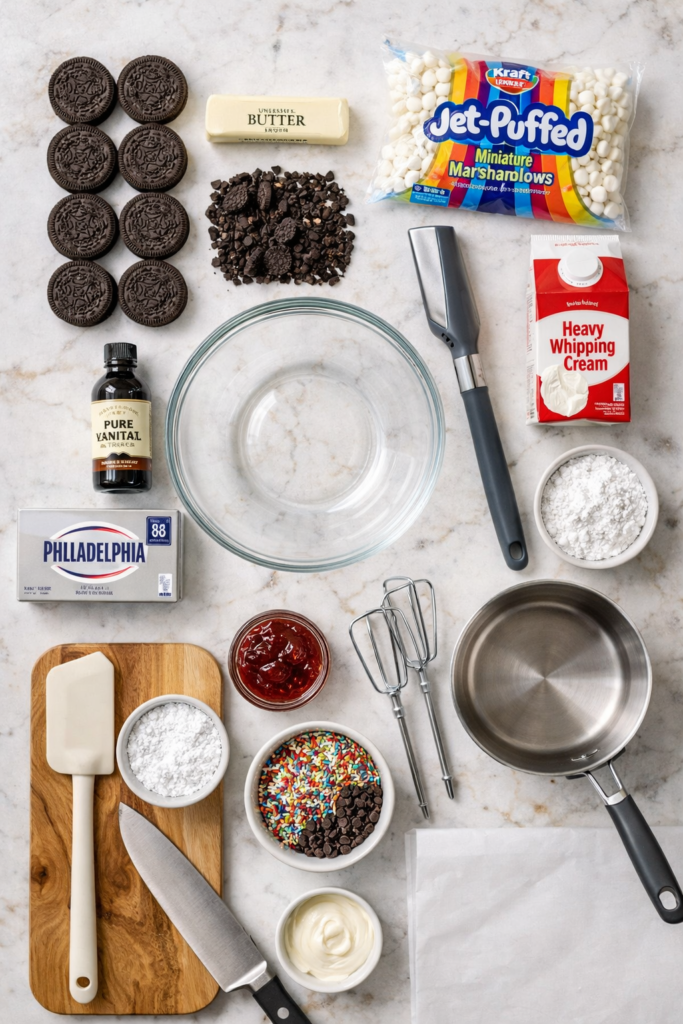
What You’ll Need
For the Oreo “Rice”:
- 36 Oreo cookies (3 cups crushed)
- 4 tablespoons unsalted butter, melted
- 3 cups mini marshmallows
- 1/2 teaspoon vanilla extract
For the Filling:
- 8 oz cream cheese, softened to room temperature
- 1/4 cup powdered sugar
- 1 teaspoon vanilla extract
- 1/2 cup heavy whipping cream
For the “Dipping Sauce” (Optional but Recommended):
- 1/2 cup strawberry jam or raspberry jam (your call)
- 1 tablespoon warm water (to thin it out)
For Garnish:
- Crushed Oreo crumbs (for rolling the outside)
- Rainbow sprinkles or mini chocolate chips (optional)
Tools You’ll Need
- Large mixing bowl
- Medium saucepan
- Rubber spatula
- Hand mixer or stand mixer
- Plastic wrap (a lot of it)
- Sharp knife
- Cutting board
- Parchment paper
- Rolling pin (optional, for flattening the Oreo layer)
Pro Tips
These are the things I wish someone had told me the first time I made this:
- Crush your Oreos fine. Chunky Oreo crumbs won’t hold together the same way. Pulse them in a food processor until they’re almost like dark sand. The finer the crumb, the better the “sushi” holds its shape when you slice it.
- Let the cream cheese sit out. Seriously, don’t skip this. Cold cream cheese = lumpy filling. Pull it from the fridge 30 to 45 minutes before you start.
- Work fast with the marshmallow Oreo layer. Once you mix in the melted marshmallows, you have a small window before it stiffens up. Get it flattened on the plastic wrap quickly and don’t second-guess yourself.
- Chill before you cut. Rolling it up is satisfying but slicing it too soon is where people go wrong. Give it at least 2 hours in the fridge. Overnight is even better. Cold rolls slice cleanly without falling apart.
- Use dental floss for slicing. This sounds weird but it works incredibly well. Run unflavored dental floss under the roll and cross the two ends over the top. Pull tight. You get a perfect, clean cut every time without squishing the roll.
How to Make Oreo Sushi
Step 1: Make the Oreo Base
Crush your Oreos in a food processor until fine. Set aside about 3 tablespoons for rolling the outside later.
Melt the butter in a medium saucepan over low heat. Add the mini marshmallows and stir constantly until fully melted and smooth.
Remove from heat and stir in the vanilla extract, then fold in the crushed Oreos. Mix quickly until everything is combined.
Step 2: Flatten the Oreo Layer
Lay a large piece of plastic wrap on a flat surface. Spoon the Oreo mixture onto it and press it into a rectangle roughly 10×12 inches. About 1/4 inch thick.
You can use a rolling pin or just your hands. Work fast because it firms up quickly.
Set aside and let it cool slightly while you make the filling.
Step 3: Make the Cream Cheese Filling
Beat the softened cream cheese with powdered sugar and vanilla extract until smooth and fluffy.
In a separate bowl, whip the heavy cream until stiff peaks form.
Gently fold the whipped cream into the cream cheese mixture. This keeps the filling light and pipeable rather than dense.
Step 4: Assemble
Spread the cream cheese filling evenly over the Oreo base. Leave about half an inch clear along one of the long edges (this helps it seal).
Now roll it up like a sushi roll using the plastic wrap to guide it. Pull the plastic wrap tight and twist both ends to seal.
Step 5: Chill
Place the roll in the fridge for at least 2 hours. Overnight is ideal.
Step 6: Slice and Serve
Unwrap the roll and gently press the outside into the reserved Oreo crumbs.
Slice into 1-inch rounds using a sharp knife or dental floss (see Pro Tip #5 above).
Mix the jam with warm water to thin it slightly and serve as a dipping sauce on the side.
Arrange the rounds on a plate the same way you would real sushi. Watch people’s reactions. 😄

Substitutions and Variations
No marshmallows? Use 2 tablespoons of corn syrup + 2 tablespoons of butter to bind the Oreo base instead. The texture will be slightly denser but still great.
Dairy-free? Swap the cream cheese for a dairy-free version (Kite Hill works well), use coconut cream instead of heavy whipping cream, and use vegan butter.
Want to skip the filling? Some versions use just peanut butter or Nutella spread straight onto the Oreo base. Simpler and still delicious.
Different cookie base? Golden Oreos make a beautiful blonde sushi roll. Mint Oreos add a fun twist. Basically any sandwich cookie works here.
Add fruit inside? Thinly sliced strawberries or raspberries layered over the cream cheese filling add a fruity contrast that cuts through the sweetness.
Make Ahead Tips
This one is genuinely great for making ahead:
- Roll it up, wrap tightly in plastic wrap, and refrigerate up to 48 hours before slicing.
- Slice only when you’re ready to serve since the cut pieces dry out faster.
- The dipping sauce can be made up to 5 days in advance and stored in a jar in the fridge.
Nutritional Information (Per Piece, Approximate)
| Nutrient | Amount (Per Roll Slice) |
|---|---|
| Calories | ~145 kcal |
| Total Fat | 9g |
| Saturated Fat | 5g |
| Carbohydrates | 15g |
| Sugar | 9g |
| Protein | 2g |
| Sodium | 95mg |
Based on 16 slices per roll. Values will vary slightly depending on brands used.
For lower sugar: Use reduced-sugar Oreos and swap powdered sugar for a monk fruit powdered sweetener.
For higher protein: Fold 2 tablespoons of unflavored protein powder into the cream cheese filling. The flavor difference is minimal.
Meal Pairing Suggestions
Oreo sushi works well at:
- Slumber parties and kids’ gatherings (obviously)
- Potlucks where you want to bring something that gets talked about
- Dessert boards alongside strawberries, brownie bites, and chocolate-covered pretzels
- Birthday parties as a no-bake alternative to cake
Pair with cold milk, hot coffee, or a glass of dessert wine if you’re keeping it adult-friendly.
Leftovers and Storage
Store leftover Oreo sushi pieces in an airtight container in the refrigerator.
They’ll stay fresh for up to 3 days. After that the Oreo base starts to soften too much and the filling gets a little watery.
Freezing: You can freeze the whole uncut roll (wrapped tightly in plastic wrap + a layer of foil) for up to 4 weeks. Thaw overnight in the fridge, then slice and serve. Don’t freeze after slicing because the texture breaks down.
FAQ
Does this actually taste like sushi?
Not even remotely, and that’s completely the point. It looks like sushi, it’s presented like sushi, but it tastes like an Oreo cheesecake. The fun is in the presentation.
Can kids help make this?
Yes, mostly. The marshmallow step involves a hot stove so that part is adult territory. But crushing the Oreos, spreading the filling, and rolling it up are all great for kids to join in on.
What if my roll falls apart when I slice it?
It wasn’t chilled long enough. Pop it back in the fridge for another hour and try again. Also make sure your filling wasn’t too loose before you rolled it up.
Can I make this without a food processor?
You can put the Oreos in a zip-lock bag and crush them with a rolling pin. It takes a bit more effort but works fine. Just make sure there are no large chunks left.
How many does one roll serve?
One roll sliced into 1-inch pieces gives you about 10 to 16 pieces depending on how thick you cut them. Most people eat 3 to 4 pieces as a dessert serving, so plan for 3 to 5 servings per roll.
Can I use the filling-free Oreos?
Yes. If you want a less sweet base, using plain chocolate wafers (like Nabisco Famous Chocolate Wafers) gives you the same effect without the filling’s added sugar.
Wrapping Up
Oreo sushi is one of those recipes that earns a permanent spot in your rotation. It’s low effort, makes a big impression, and genuinely tastes as good as it looks.
The first time you put a plate of these in front of people and watch them try to figure out if they’re looking at real sushi or dessert… that moment is worth the 20 minutes it takes to make them.
Give it a go this week and drop a comment below letting me know how it went. Did you add any variations? Did someone at the table actually think it was real sushi? I want to hear all of it. 😄


