
Ever wonder why restaurant dumplings taste so much better than the ones you make at home?
It’s not luck. It’s not some secret ingredient locked away in a vault.
It’s technique. And today, you’re learning all of it.
I’m talking about that perfectly seasoned, juicy chicken filling that makes you close your eyes on the first bite. The kind that has just enough ginger to wake up your taste buds without overpowering everything else. The filling that stays moist even after cooking but never turns watery or bland.
You know the one.
And here’s what nobody tells you: making dumpling filling from scratch is actually easier than you think. You just need to know a few tricks that Chinese grandmas have been using for centuries (and that I’m about to share with you).
This recipe makes enough filling for about 40-50 dumplings, which sounds like a lot until you realize how fast they disappear. Trust me on this.
What You’ll Need
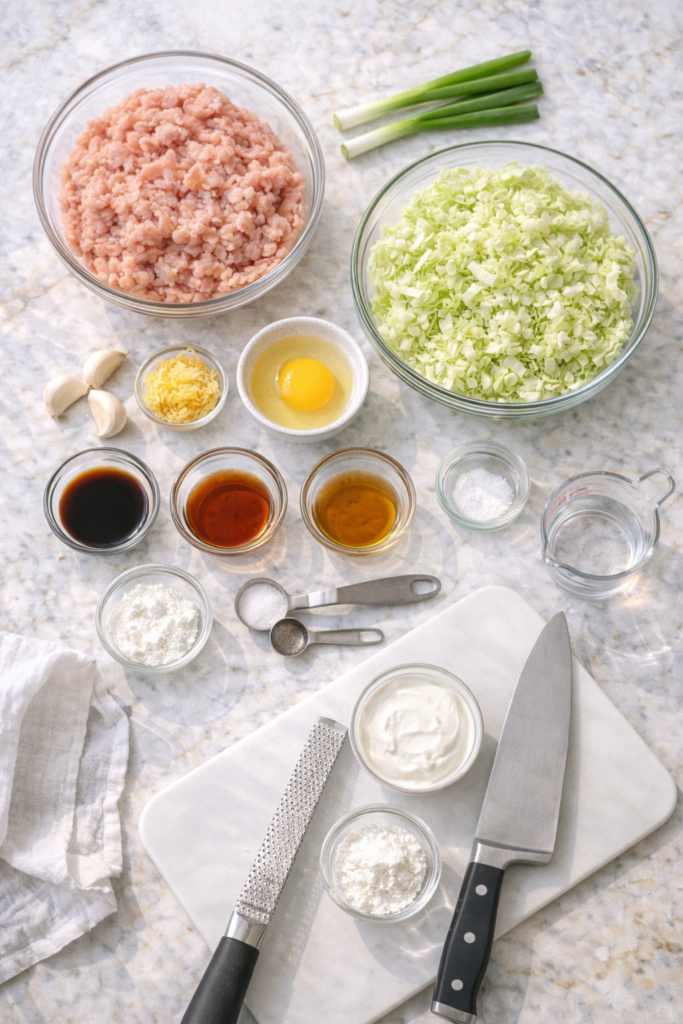
For the Chicken Filling:
- 1 pound ground chicken (or finely chopped chicken thighs)
- 2 cups napa cabbage, finely chopped
- 3 green onions, finely minced
- 2 tablespoons fresh ginger, grated
- 3 cloves garlic, minced
- 2 tablespoons soy sauce
- 1 tablespoon sesame oil
- 1 tablespoon Shaoxing wine (Chinese cooking wine)
- 1 teaspoon sugar
- 1/2 teaspoon white pepper
- 1 teaspoon salt
- 1 egg, lightly beaten
- 2 tablespoons cornstarch
- 3 tablespoons cold water
Tools You’ll Need:
- Large mixing bowl
- Fine grater or microplane (for ginger)
- Sharp knife and cutting board
- Clean kitchen towel or cheesecloth
- Measuring spoons
- Small bowl for mixing the cornstarch slurry
Pro Tips
Squeeze that cabbage like your life depends on it. Napa cabbage holds a ridiculous amount of water, and if you don’t squeeze it out completely, your filling will be soupy and sad. After chopping, sprinkle with a little salt, let it sit for 10 minutes, then wring it out in a clean kitchen towel. You’ll be shocked at how much liquid comes out.
Mix in one direction only. This isn’t me being picky. When you stir the filling, always go clockwise or counterclockwise, but pick one and stick with it. This develops the proteins in the meat and creates that bouncy, springy texture you get in restaurant dumplings. Mix for at least 2-3 minutes until the filling becomes sticky and holds together.
The cold water trick changes everything. Adding cold water tablespoon by tablespoon while mixing makes the filling incredibly juicy. The meat absorbs the water, and when it cooks, it stays moist instead of drying out. Add it slowly and let the filling absorb each addition before adding more.
Taste test before you commit. You can’t eat raw chicken, but you can microwave a small spoonful for 30 seconds to test the seasoning. Do this before you fill all your dumplings. Nothing’s worse than realizing your filling needs more salt after you’ve already wrapped 30 of them.
Use dark meat if you can. Ground chicken thighs have more fat than breast meat, which means more flavor and a juicier filling. If you can only find ground chicken breast, add an extra tablespoon of sesame oil to compensate.
Substitutions and Variations
Protein swaps: Ground pork is the traditional choice and honestly, it’s amazing. You can also use ground turkey, but add extra sesame oil because turkey is lean and can dry out. For a fancy version, try half chicken and half shrimp (chopped into small pieces).
Vegetable options: Don’t have napa cabbage? Regular green cabbage works, but it’s a bit tougher, so chop it extra fine. Bok choy is another great option. Some people love adding shiitake mushrooms (finely diced) for an earthy flavor, about 1/2 cup.
Wine substitute: No Shaoxing wine? Dry sherry is the closest substitute. In a pinch, use sake or just leave it out and add an extra tablespoon of soy sauce.
Gluten-free version: Swap the soy sauce for tamari and use tapioca starch instead of cornstarch. Easy.
Spice it up: Add 1-2 teaspoons of chili oil or a pinch of red pepper flakes if you like heat. Or fold in some finely chopped Thai basil or cilantro at the end for a fresh twist.
Make Ahead Tips
This filling actually gets better if you make it a few hours ahead. The flavors meld together and everything gets happy.
Mix up the filling, cover it tightly with plastic wrap, and refrigerate for up to 24 hours before using.
You can also freeze the mixed filling for up to 3 months. Just thaw it in the fridge overnight before using. The texture might be slightly softer, but it’ll still taste incredible.
If you’re really organized (who are you?), you can portion the filling into freezer bags, flatten them out, and stack them. Label with the date and you’ve got dumpling filling ready to go whenever the craving hits.
How to Make the Filling
Step 1: Prep the cabbage
Chop your napa cabbage as finely as you can. We’re talking tiny pieces, not chunks.
Sprinkle about 1/2 teaspoon of salt over the chopped cabbage and toss it together. Let it sit for 10 minutes. This draws out the moisture.
After 10 minutes, grab a clean kitchen towel or several layers of cheesecloth. Dump the cabbage in the center, gather the edges, and twist that towel like you’re wringing out a wet swimsuit. Keep going until barely any liquid comes out.
Set the cabbage aside.
Step 2: Make the cornstarch slurry
In a small bowl, mix the cornstarch with the cold water until it’s completely smooth. No lumps allowed.
This is going to help bind everything together and add moisture to the filling. Set it aside.
Step 3: Combine the base ingredients
In your large mixing bowl, add the ground chicken, squeezed cabbage, green onions, ginger, and garlic.
Don’t mix yet.
Step 4: Add the seasonings
Pour in the soy sauce, sesame oil, Shaoxing wine, sugar, white pepper, and salt.
Crack in your egg.
Add the cornstarch slurry.
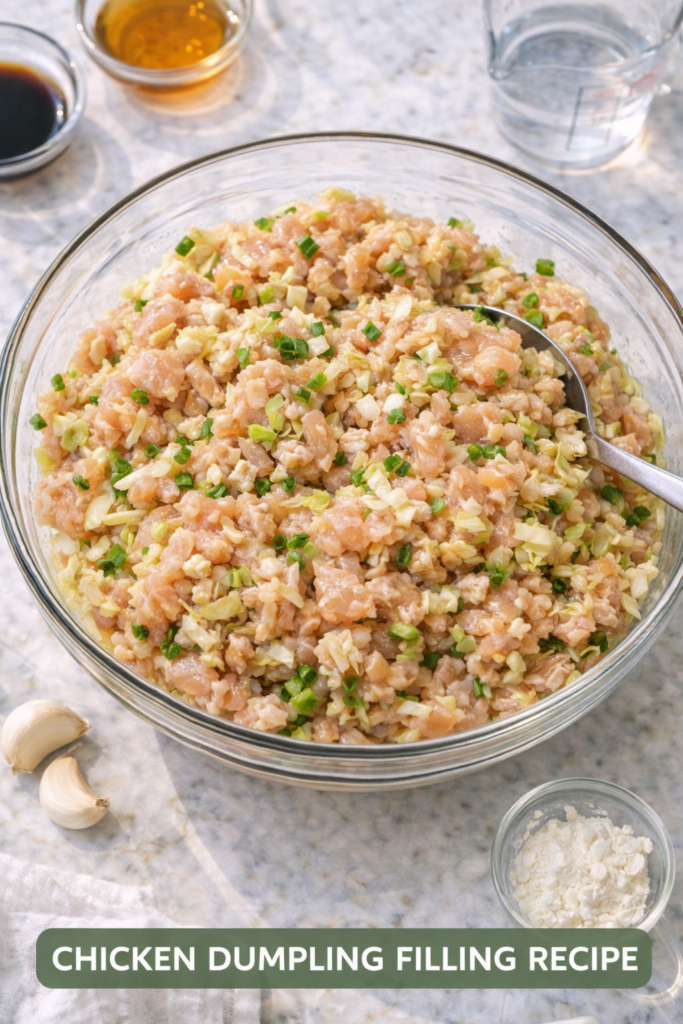
Step 5: Mix (this is the important part)
Now here’s where the magic happens. Choose a direction (clockwise or counterclockwise) and start mixing with your hand or a large spoon.
Keep mixing in the same direction for 2-3 minutes. Your arm will get tired. That’s normal.
The mixture will start to look sticky and will begin to pull away from the sides of the bowl. It should look glossy and hold together when you pick up a handful.
Step 6: Add the cold water
This is the secret weapon. Add the cold water one tablespoon at a time, mixing thoroughly between each addition.
The filling should absorb each addition before you add the next one. This keeps the filling juicy and prevents it from being dry after cooking.
Step 7: Test the seasoning
Scoop out about a tablespoon of filling and put it on a small plate. Microwave for 30 seconds.
Taste it. Does it need more salt? More ginger? More sesame oil? Adjust the raw mixture as needed.
Step 8: Let it rest
Cover the bowl with plastic wrap and let the filling rest in the fridge for at least 30 minutes. This lets the flavors develop and makes the filling easier to work with when you’re ready to fill your dumplings.
Your filling is ready to use! Now you can fill your dumpling wrappers and cook them however you prefer (steamed, pan-fried, boiled).
Additional Details
Nutritional Information (per 2 tablespoons of filling):
- Calories: 45
- Protein: 5g
- Fat: 2g
- Carbohydrates: 2g
- Sodium: 180mg
Keep in mind this is just the filling. Once you add wrappers and cooking oil (if pan-frying), the numbers change.
Pairing Suggestions:
This filling works beautifully with any dumpling preparation:
- Steamed for the lightest, most delicate option
- Pan-fried (potstickers) for crispy bottoms and soft tops
- Boiled for classic comfort food
- Soup dumplings if you’re feeling adventurous
Serve with a simple dipping sauce: mix equal parts soy sauce and black vinegar, add a splash of sesame oil, and sprinkle with chopped green onions. Some people add chili oil. I always add chili oil.
Cooking Time Efficiency:
The actual mixing takes about 15 minutes if you work efficiently. Resting time is 30 minutes minimum, but you can let it sit for up to 24 hours.
If you’re making dumplings start to finish in one session, here’s the timeline:
- Prep and mix filling: 15 minutes
- Rest time: 30 minutes (use this to make your dipping sauce or prep your steamer)
- Wrapping: 30-40 minutes for 40 dumplings if you’re new at this
- Cooking: 10-15 minutes depending on method
Total active time: About 1 hour, plus resting.
Leftovers and Storage
Storing uncooked filling:
Keep it in an airtight container in the fridge for up to 2 days. After that, the cabbage can start to release more water and the texture gets weird.
Freeze it for up to 3 months. Thaw overnight in the fridge before using.
Storing filled dumplings:
If you’ve already filled your dumplings but aren’t ready to cook them, place them on a parchment-lined baking sheet, making sure they don’t touch each other. Freeze until solid (about 2 hours), then transfer to a freezer bag. They’ll keep for 3 months.
Cook frozen dumplings straight from the freezer. Don’t thaw them first or they’ll get soggy.
Cooked dumplings:
These are best eaten fresh, but you can store cooked dumplings in the fridge for 2-3 days. Reheat them in a hot pan with a little oil to crisp them up again, or steam them for a few minutes.
Don’t microwave cooked dumplings unless you enjoy eating rubber. Just don’t.
FAQ
Can I use pre-ground chicken from the store?
Absolutely. That’s what most people use and it works great. If you want extra control over the texture, you can buy chicken thighs and chop them by hand with a knife until they’re finely minced. It takes longer but the texture is incredible.
Why is my filling watery?
You didn’t squeeze the cabbage enough. Go back and squeeze it again. Seriously. Get all that water out.
Can I make this without cabbage?
You can, but the texture will be different. Cabbage adds moisture and a slight crunch. If you skip it, add an extra 2 tablespoons of cold water to keep the filling juicy.
How do I know when the dumplings are cooked?
The wrappers will turn translucent and the filling should register 165°F on a meat thermometer. For pan-fried dumplings, the bottoms should be golden brown and crispy. For boiled dumplings, they’ll float to the surface and the wrappers will look slightly puffy.
My filling falls apart when I try to fill the wrappers. What am I doing wrong?
You probably didn’t mix it long enough. The filling needs to be sticky and hold together. Mix for at least 2-3 minutes in one direction until it’s cohesive. Also, make sure your cornstarch slurry was fully incorporated.
Can I use this filling for wontons or buns?
Yes! This filling works great for wontons, steamed buns (baozi), or even spring rolls. You might want to chop everything slightly finer for wontons since they’re smaller.
Is there a vegetarian version?
You can substitute the chicken with firm tofu (pressed and crumbled), but the texture will be completely different. Add extra mushrooms and maybe some cooked glass noodles (chopped) to bulk it up. You’ll need to adjust the seasonings too.
What’s the difference between this and pork dumpling filling?
Chicken is leaner and milder than pork. Pork dumpling filling traditionally uses fattier ground pork, which makes it juicier and richer. The techniques are the same, but pork has a stronger flavor. This chicken version is lighter and takes on the aromatics (ginger, garlic, green onion) more noticeably.
Wrapping Up
Look, dumpling filling isn’t rocket science. But it is one of those things where a few small techniques make a massive difference.
Squeeze that cabbage. Mix in one direction. Add the water slowly. Let it rest.
Do those things and you’ll have filling that rivals your favorite dumpling spot. Maybe even better because you made it yourself and you know exactly what went into it.
The first batch might not be perfect. That’s fine. The second batch will be better. By the third time you make this, you’ll be eyeballing measurements and adjusting on the fly like you’ve been doing it your whole life.
Now go make some dumplings. Your kitchen is about to smell incredible.
Drop a comment below and tell me how they turned out! Did you steam them? Pan-fry them? Did you add any of your own twists? I want to hear all about it.


