
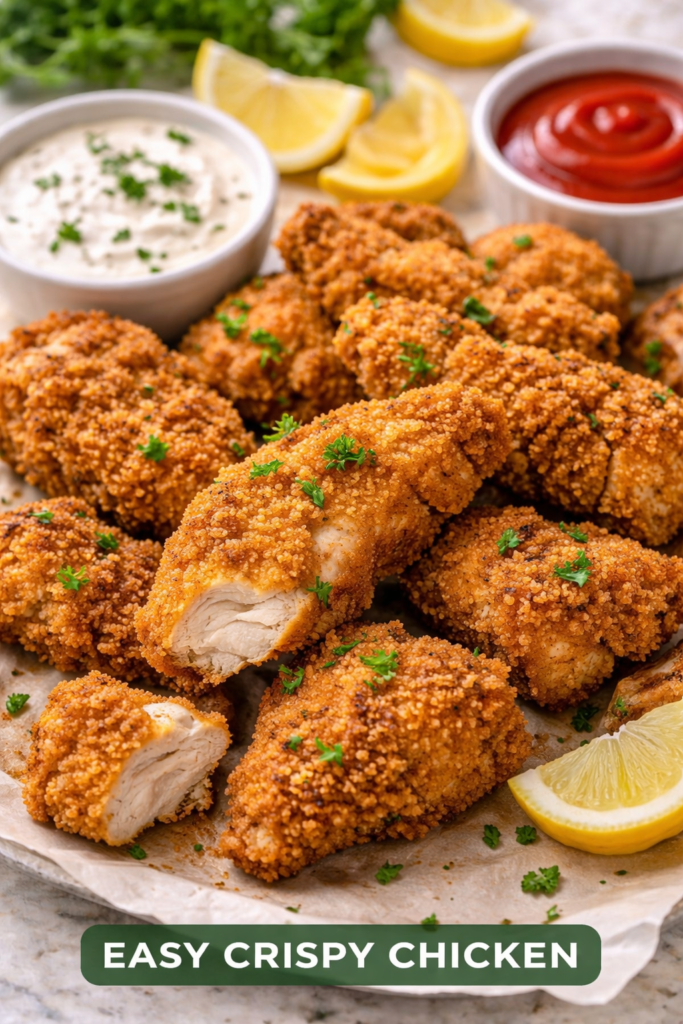
You know that golden-brown, shatteringly crisp chicken you get from your favorite takeout spot? The kind where every bite gives you that satisfying crunch before hitting juicy, tender meat?
You can make it at home. And it’s ridiculously simple.
I’m talking about chicken that stays crispy even after sitting for 20 minutes. No special equipment required. No deep fryer taking up counter space. Just a handful of ingredients you probably already have and one technique that changes everything.
The secret isn’t buttermilk or fancy seasonings (though we’ll use both). It’s all about the double coating method and getting your oil temperature just right. Once you nail this, you’ll stop ordering out.
What You’ll Need
For the Chicken:
- 2 lbs chicken thighs or breasts (bone-in, skin-on thighs work best)
- 2 cups buttermilk
- 2 teaspoons hot sauce (Frank’s or Louisiana-style)
- 1 tablespoon garlic powder
- 1 tablespoon onion powder
- 2 teaspoons paprika
- 2 teaspoons salt
- 1 teaspoon black pepper
- 1/2 teaspoon cayenne pepper (adjust to taste)
For the Coating:
- 2 cups all-purpose flour
- 1/2 cup cornstarch
- 1 tablespoon garlic powder
- 1 tablespoon onion powder
- 2 teaspoons paprika
- 2 teaspoons salt
- 1 teaspoon black pepper
- 1 teaspoon cayenne pepper
- 1/2 teaspoon baking powder
For Frying:
- Vegetable oil or peanut oil (about 3-4 cups, enough for 2 inches in your pan)
Pro Tips
Temperature is everything. Get yourself a thermometer. Oil that’s too cool makes soggy chicken. Too hot and you’ll burn the outside while the inside stays raw. Keep it between 350-375°F and you’re golden.
Don’t skip the buttermilk soak. I’ve tried making this without marinating and it’s just not the same. The buttermilk tenderizes the meat and helps the coating stick. Even 30 minutes makes a difference, but overnight is chef’s kiss.
Let the coated chicken rest. After you coat each piece, let it sit on a wire rack for 10-15 minutes before frying. This helps the coating set up and stick better. I learned this the hard way when half my coating fell off in the oil.
Fry in batches. Crowding the pan drops the oil temperature and you end up steaming instead of frying. Give each piece space to breathe.
Use a wire rack, not paper towels. Paper towels trap steam underneath and make the bottom soggy. A wire rack lets air circulate and keeps everything crispy.
Tools You’ll Need
- Large bowl for marinating
- Medium bowl for flour mixture
- Large heavy-bottomed pot or deep skillet (cast iron is perfect)
- Wire cooling rack
- Baking sheet
- Kitchen thermometer (seriously, get one)
- Tongs
- Paper towels
How to Make It
Step 1: Marinate the Chicken
Mix buttermilk, hot sauce, and half the spices (1 tablespoon garlic powder, 1 tablespoon onion powder, 2 teaspoons paprika, 2 teaspoons salt, 1 teaspoon black pepper, 1/2 teaspoon cayenne) in a large bowl.
Add chicken pieces and make sure they’re fully submerged. Cover and refrigerate for at least 2 hours, or overnight if you’re planning ahead.
Step 2: Set Up Your Breading Station
In a shallow dish or bowl, whisk together flour, cornstarch, and remaining spices (1 tablespoon garlic powder, 1 tablespoon onion powder, 2 teaspoons paprika, 2 teaspoons salt, 1 teaspoon black pepper, 1 teaspoon cayenne, 1/2 teaspoon baking powder).
The cornstarch is what makes it extra crispy. The baking powder helps it puff up slightly and creates more texture. Trust me on this.
Step 3: Coat the Chicken
Pull each piece from the buttermilk, letting excess drip off. Don’t shake it completely dry though. You want it a little wet.
Dredge in the flour mixture, pressing it into every crevice. Make sure you get good coverage.
Here’s the key: dip it back in the buttermilk quickly, then back into the flour for a second coat. This double dredge creates those craggy bits that get super crispy.
Place coated pieces on a wire rack and let them rest for 10-15 minutes.
Step 4: Heat Your Oil
Pour oil into your pot until it’s about 2 inches deep. Heat over medium-high until it reaches 350-375°F.
Test it by dropping a pinch of flour in. If it sizzles immediately and floats, you’re ready.
Step 5: Fry the Chicken
Carefully lower 2-3 pieces into the oil (don’t overcrowd). The temperature will drop a bit, so adjust your heat to maintain 350-375°F.
Fry for 12-15 minutes, flipping halfway through. Bone-in thighs take about 15 minutes, boneless breasts about 12 minutes.
You’re looking for deep golden brown and an internal temperature of 165°F.
Step 6: Drain and Rest
Transfer to a wire rack set over a baking sheet. Season with a pinch of salt while it’s still hot.
Let it rest for 5 minutes before serving. I know it’s hard to wait, but this lets the juices redistribute.
Substitutions and Variations
No buttermilk? Mix 2 cups whole milk with 2 tablespoons white vinegar or lemon juice. Let it sit for 10 minutes. Works like a charm.
Want it spicier? Add more cayenne or throw some hot sauce directly into the flour mixture. You can also marinate in pickle juice mixed with buttermilk for a Nashville hot vibe.
Gluten-free option: Replace all-purpose flour with a 1:1 gluten-free flour blend. The texture will be slightly different but still delicious.
Different proteins: This method works great with chicken tenders, wings, or even pork chops. Just adjust cooking times based on thickness.
Herb variation: Add 2 tablespoons of dried herbs (Italian seasoning, thyme, or oregano) to the flour mixture for a different flavor profile.
Air fryer method: Spray coated chicken with cooking oil and air fry at 400°F for 20-25 minutes, flipping halfway. It won’t be quite as crispy as fried, but it’s pretty close.
Make Ahead Tips
You can marinate the chicken up to 24 hours in advance. Any longer and the buttermilk starts breaking down the meat too much.
The flour mixture can be prepped and stored in an airtight container for up to a week.
I don’t recommend coating the chicken ahead of time. The coating gets soggy in the fridge.
If you want to prep fully, you can fry the chicken, let it cool completely, then freeze. Reheat in a 375°F oven for 15-20 minutes straight from frozen. It comes out surprisingly crispy.
Nutritional Information (Per Serving)
Based on 6 servings:
- Calories: 425
- Protein: 32g
- Fat: 22g
- Carbohydrates: 26g
- Fiber: 1g
- Sugar: 3g
- Sodium: 890mg
Note: Nutritional values are approximate and will vary based on exact ingredients used and portion sizes.
Pairing Suggestions
This chicken goes with pretty much everything, but here are my favorites:
Classic sides: Mashed potatoes, coleslaw, mac and cheese, corn on the cob, biscuits
Lighter options: Green salad with ranch, roasted vegetables, cucumber salad, pickles
Carb-heavy comfort: French fries, sweet potato fries, potato salad, baked beans
For sandwiches: Pile it on a brioche bun with pickles, mayo, and hot sauce. Add shredded lettuce if you’re feeling fancy.
Sauces: Honey for drizzling, ranch dressing, hot sauce, garlic aioli, comeback sauce
Leftovers and Storage
Store leftover chicken in an airtight container in the fridge for up to 3 days.
The microwave will make it soggy, so don’t even think about it. Reheat in a 375°F oven for 10-15 minutes until warmed through and crispy again. You can also use an air fryer at 350°F for 5-7 minutes.
Cold fried chicken is actually pretty great too. I won’t judge if you eat it straight from the fridge.
For longer storage, freeze cooked chicken in a freezer-safe bag for up to 3 months. Thaw in the fridge overnight before reheating.
Frequently Asked Questions
Can I bake this instead of frying?
You can, but it won’t be the same. Baking at 425°F for 35-40 minutes will give you crispy chicken, but it lacks that deep-fried crunch. Spray it with cooking oil before baking to help it crisp up.
Why is my coating falling off?
Usually this means the chicken was too wet when you coated it, or you didn’t let it rest before frying. Make sure to let excess buttermilk drip off and give the coating time to set before it hits the oil.
How do I know when it’s done?
Use a meat thermometer. Internal temperature should hit 165°F. If you don’t have a thermometer, the juices should run clear when you pierce the thickest part.
Can I use chicken breasts instead of thighs?
Absolutely. Just know that breasts dry out faster, so watch your cooking time. Aim for 12-14 minutes instead of 15.
What oil is best for frying?
Vegetable oil, peanut oil, or canola oil all work great. They have high smoke points and neutral flavors. Avoid olive oil.
My chicken is burning on the outside but raw inside. What happened?
Your oil is too hot. Drop the temperature to 350°F and make sure you’re monitoring it throughout cooking.
Can I reuse the frying oil?
Yes. Let it cool completely, strain it through a fine-mesh sieve or cheesecloth to remove debris, and store in an airtight container. You can reuse it 2-3 times for similar foods.
Wrapping Up
There’s something deeply satisfying about pulling off restaurant-quality fried chicken at home. That first bite when the coating shatters and you hit that juicy meat underneath? Worth every minute.
This recipe isn’t complicated. It doesn’t require you to be a trained chef or have fancy equipment. Just some patience, a thermometer, and willingness to get your hands a little messy.
Make this on a random Tuesday night. Serve it at your next gathering. Pack it for a picnic. It works for literally any occasion.
The first time I made this, I ate three pieces standing at the counter before I even plated it for dinner. No shame. It’s that good.
Now go make some crispy chicken and tell me how it goes. Did you add extra spice? Try a different protein? Burn your first batch? (We’ve all been there.) Drop a comment below and let me know how yours turned out.


