
When I first made these cookies, I threw in literally everything I had in my pantry.
Chocolate chips, pretzels, M&Ms, potato chips, toffee bits. You name it, it went in. And you know what? They turned out to be the best cookies I’ve ever made.
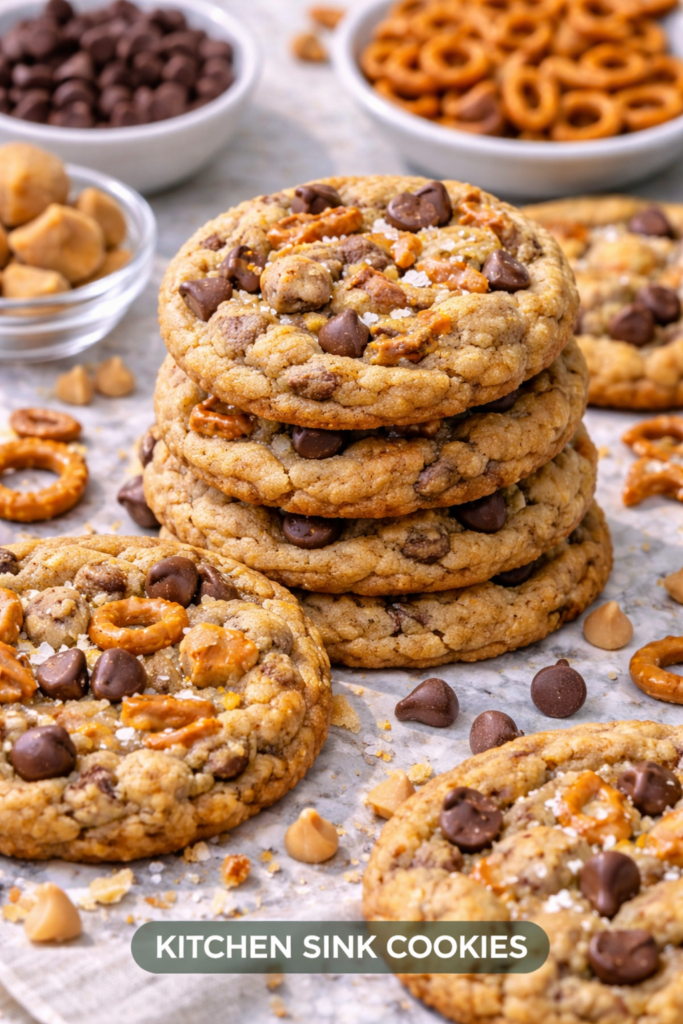
Kitchen sink cookies are exactly what they sound like. Everything but the kitchen sink goes into these bad boys. They’re salty, sweet, crunchy, chewy, and ridiculously addictive.
I’m talking about cookies that have layers of flavor in every single bite. One second you’re tasting chocolate, the next you get a hit of salt from a potato chip, then toffee, then pretzel. It’s like a party in your mouth and everyone’s invited.
The best part? There’s no wrong way to make them. Got leftover Halloween candy? Throw it in. Random bag of nuts in the back of your pantry? Perfect. That’s the whole point.
These cookies are thick, chewy in the middle, slightly crispy on the edges, and loaded with so much stuff that you can barely see the actual cookie dough. They’re the kind of cookies that make people ask for the recipe immediately.
What You’ll Need
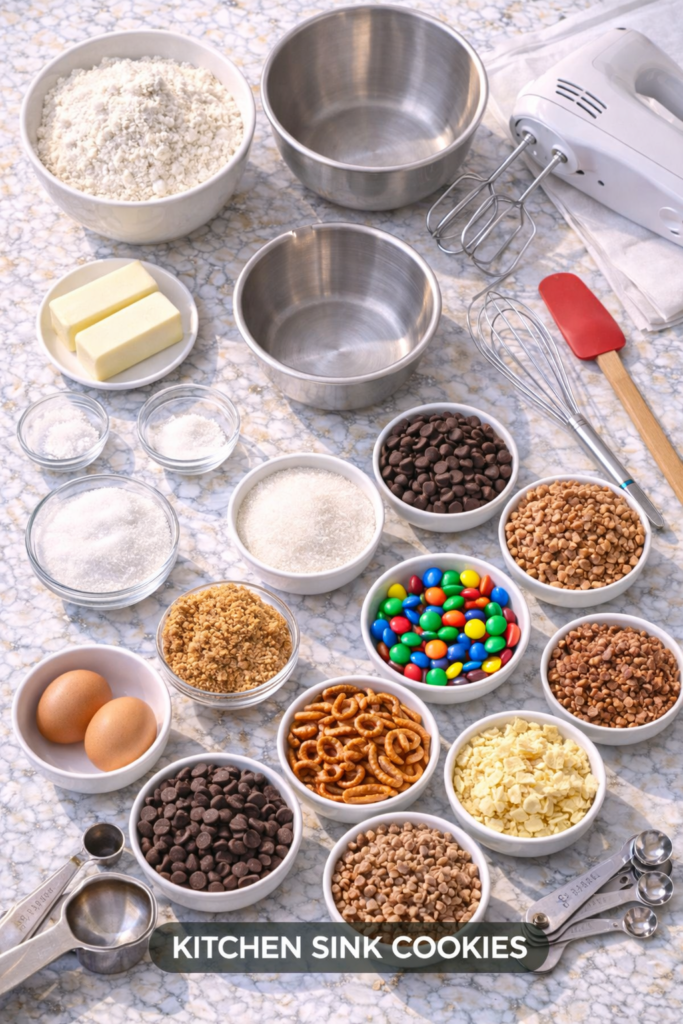
For the Cookie Dough:
- 2 ¼ cups all-purpose flour
- 1 teaspoon baking soda
- 1 teaspoon salt
- 1 cup (2 sticks) unsalted butter, softened
- ¾ cup granulated sugar
- ¾ cup packed brown sugar
- 2 large eggs
- 2 teaspoons vanilla extract
For the Mix-Ins (this is where it gets fun):
- 1 cup semi-sweet chocolate chips
- 1 cup milk chocolate chips
- ¾ cup crushed pretzels
- ¾ cup crushed potato chips
- ½ cup M&Ms
- ½ cup toffee bits
- ½ cup chopped pecans or walnuts
- ⅓ cup white chocolate chips (optional but recommended)
Tools You’ll Need
You don’t need any fancy equipment for these. Just the basics:
- 2 large mixing bowls
- Electric mixer (or a wooden spoon and some arm strength)
- Whisk
- Rubber spatula
- Baking sheets (2-3 is ideal)
- Parchment paper or silicone baking mats
- Cookie scoop (3 tablespoon size works best)
- Cooling rack
- Measuring cups and spoons
Pro Tips
Chill the dough. I know you want to bake these immediately, but trust me on this. Let the dough chill for at least 30 minutes. It helps the cookies hold their shape and makes them extra thick and chewy. If you can wait overnight, even better.
Don’t skimp on the salt. The magic of kitchen sink cookies is the sweet and salty combo. That pinch of salt in the dough plus the salty chips and pretzels creates this insane flavor that keeps you coming back for more. If your add-ins are already super salty, you can reduce the salt in the dough slightly, but don’t eliminate it completely.
Use room temperature butter. Cold butter won’t cream properly with the sugar, and melted butter will make your cookies spread too much. You want butter that’s soft enough to leave an indent when you press it, but not greasy or shiny. Leave it out for about 30-45 minutes before you start.
Customize the mix-ins. The mix-ins I listed are just suggestions. Use what you have and what you love. Just keep the total amount of mix-ins around 4-5 cups. Too much and the cookies won’t hold together. Too little and they’re just regular cookies.
Underbake slightly. These cookies continue cooking on the hot pan after you remove them from the oven. Pull them out when the edges are golden brown but the centers still look a tiny bit underdone. They’ll firm up as they cool and stay super soft in the middle.
How to Make Kitchen Sink Cookies
Step 1: Prep your mix-ins
Crush your pretzels and potato chips into small pieces. You want them broken up, but not pulverized into dust. Some bigger chunks are fine and actually add great texture.
If you’re using candy bars instead of M&Ms, chop them into bite-sized pieces. Same with any nuts.
Step 2: Make the dough
Whisk together your flour, baking soda, and salt in a medium bowl. Set it aside.
In a large bowl, cream the softened butter with both sugars using an electric mixer on medium speed. Beat for about 2-3 minutes until it’s light and fluffy. It should look almost like frosting.
Add the eggs one at a time, beating well after each one. Mix in the vanilla.
Step 3: Combine
Add the flour mixture to the butter mixture in three additions, mixing on low speed after each addition. Stop mixing as soon as the flour is incorporated. Overmixing makes tough cookies.
Step 4: Add all the good stuff
Fold in all your mix-ins with a rubber spatula. This part is messy and fun. Just keep folding until everything is evenly distributed throughout the dough.
The dough will be thick and packed with goodies. That’s exactly what you want.
Step 5: Chill
Cover the bowl with plastic wrap and refrigerate for at least 30 minutes. I usually do an hour.
If you’re in a rush, you can skip this, but your cookies won’t be as thick and they’ll spread more.
Step 6: Bake
Preheat your oven to 350°F. Line your baking sheets with parchment paper.
Use a cookie scoop to portion out the dough. I use a 3-tablespoon scoop for big, bakery-style cookies. Roll each scoop into a ball between your hands.
Place them on the baking sheet about 3 inches apart. They will spread.
Bake for 11-13 minutes. The edges should be golden brown and the centers should look just barely set.
Step 7: Cool
Let the cookies cool on the baking sheet for 5 minutes. They’ll be super soft and might look underdone, but don’t panic. This is normal.
Transfer them to a cooling rack and let them cool completely.
Try not to eat all of them before they’ve cooled. I know it’s hard.
Substitutions and Variations
Make them gluten-free: Use a 1:1 gluten-free flour blend. The texture will be slightly different but still delicious.
Dairy-free: Swap the butter for vegan butter or coconut oil (use ¾ cup if using coconut oil). Use dairy-free chocolate chips.
Nut-free: Skip the nuts and add more of the other mix-ins. Sunflower seeds work great too.
Different mix-ins: This is where you can go wild. Try dried cranberries, shredded coconut, crushed graham crackers, peanut butter cups, crushed Oreos, caramel bits, butterscotch chips, crushed cookies, popcorn, or cereal.
Less sweet: Reduce the granulated sugar to ½ cup and increase the brown sugar to 1 cup. This makes them less sweet and more caramel-y.
Extra thick: Freeze the dough balls for 15 minutes before baking. They’ll spread less and stay super thick.
Make Ahead Tips
These cookies are actually better the next day. The flavors meld together and the texture gets even more perfect.
Make the dough ahead: You can make the dough up to 3 days in advance. Keep it covered tightly in the fridge. Let it sit at room temperature for 10-15 minutes before scooping and baking.
Freeze the dough: Scoop the dough into balls, freeze them on a baking sheet until solid, then transfer to a freezer bag. They’ll keep for up to 3 months. Bake straight from frozen, adding 1-2 extra minutes to the bake time.
Freeze baked cookies: Let them cool completely, then freeze in an airtight container with parchment paper between layers. Thaw at room temperature for about 30 minutes.
Leftovers and Storage
Store cookies in an airtight container at room temperature for up to 5 days. Put a piece of bread in the container to keep them soft. Replace the bread slice every couple of days.
You can also freeze baked cookies for up to 3 months. Just make sure they’re completely cool before freezing.
To refresh leftover cookies, warm them in a 300°F oven for 3-5 minutes. They’ll taste fresh-baked again.
Nutritional Information
Per cookie (makes about 36 cookies):
- Calories: 185
- Fat: 9g
- Saturated Fat: 5g
- Carbohydrates: 24g
- Fiber: 1g
- Sugar: 16g
- Protein: 2g
- Sodium: 145mg
Keep in mind these numbers will vary based on what mix-ins you use.
Meal Pairing Suggestions
These cookies are rich, so pair them with something simple:
Coffee or espresso cuts through the sweetness perfectly. A cold glass of milk is also classic for a reason.
Vanilla ice cream turns these into an incredible ice cream sandwich. Just smoosh a scoop between two cookies.
Hot chocolate in the winter is pure comfort. The cookies hold up great when dunked.
Serve them after a light dinner. They’re filling, so you don’t need much else.
Cooking Time Efficiency
Total time: About 1 hour 45 minutes (including chilling time)
- Prep: 15 minutes
- Chill: 30-60 minutes
- Bake: 12 minutes per batch
- Cool: 5-10 minutes
If you’re short on time, you can skip the chilling step. Your cookies will spread more and be thinner, but they’ll still taste amazing.
Bake multiple sheets at once if you have the oven space. Just rotate them halfway through for even baking.
FAQ
Can I use salted butter instead of unsalted?
Yes, but reduce the added salt in the recipe to ½ teaspoon. Otherwise your cookies might be too salty.
Why are my cookies flat?
A few reasons this happens. Your butter might have been too warm or melted. The dough might not have been chilled long enough. Or you might have overmixed the dough. Make sure you’re measuring flour correctly too (spoon and level, don’t scoop).
Can I make these smaller or larger?
Absolutely. Just adjust the baking time. Smaller cookies (using a 1-tablespoon scoop) will need about 8-10 minutes. Larger cookies (using a ¼ cup scoop) will need 14-16 minutes.
My dough is too crumbly. What do I do?
Add a tablespoon of milk or water and mix gently. The dough should hold together when squeezed.
Can I use quick oats in these?
I didn’t include oats in this recipe, but you can absolutely add ½ cup of old-fashioned oats to the dough if you want. Just reduce the flour by ¼ cup to compensate.
How do I know when they’re done?
The edges should be golden brown and set, but the centers can still look slightly underdone. They firm up as they cool. If you wait until the centers look fully baked, they’ll be overdone once they cool.
Can I make these vegan?
Use vegan butter, flax eggs (2 tablespoons ground flaxseed mixed with 5 tablespoons water), and make sure all your mix-ins are vegan. The texture will be slightly different but still good.
Wrapping Up
Kitchen sink cookies are my favorite kind of recipe because you literally can’t mess them up.
Got different candy? Use it. No pretzels? Skip them and add more of something else. Want to throw in some coconut or dried fruit? Go for it.
These cookies are forgiving, fun to make, and taste incredible. They’re the kind of thing you’ll want to make on repeat, and every batch will be a little different depending on what you throw in.
Make a batch this weekend. Bring them to a party and watch them disappear in minutes. Or keep them all to yourself. I won’t judge. 🍪
Drop a comment below and let me know what wild mix-ins you used. I want to hear about your cookie creations.


