You know that moment when you take a bite of something and your entire body just stops?
That’s this cake.
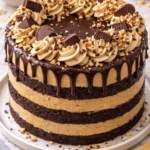
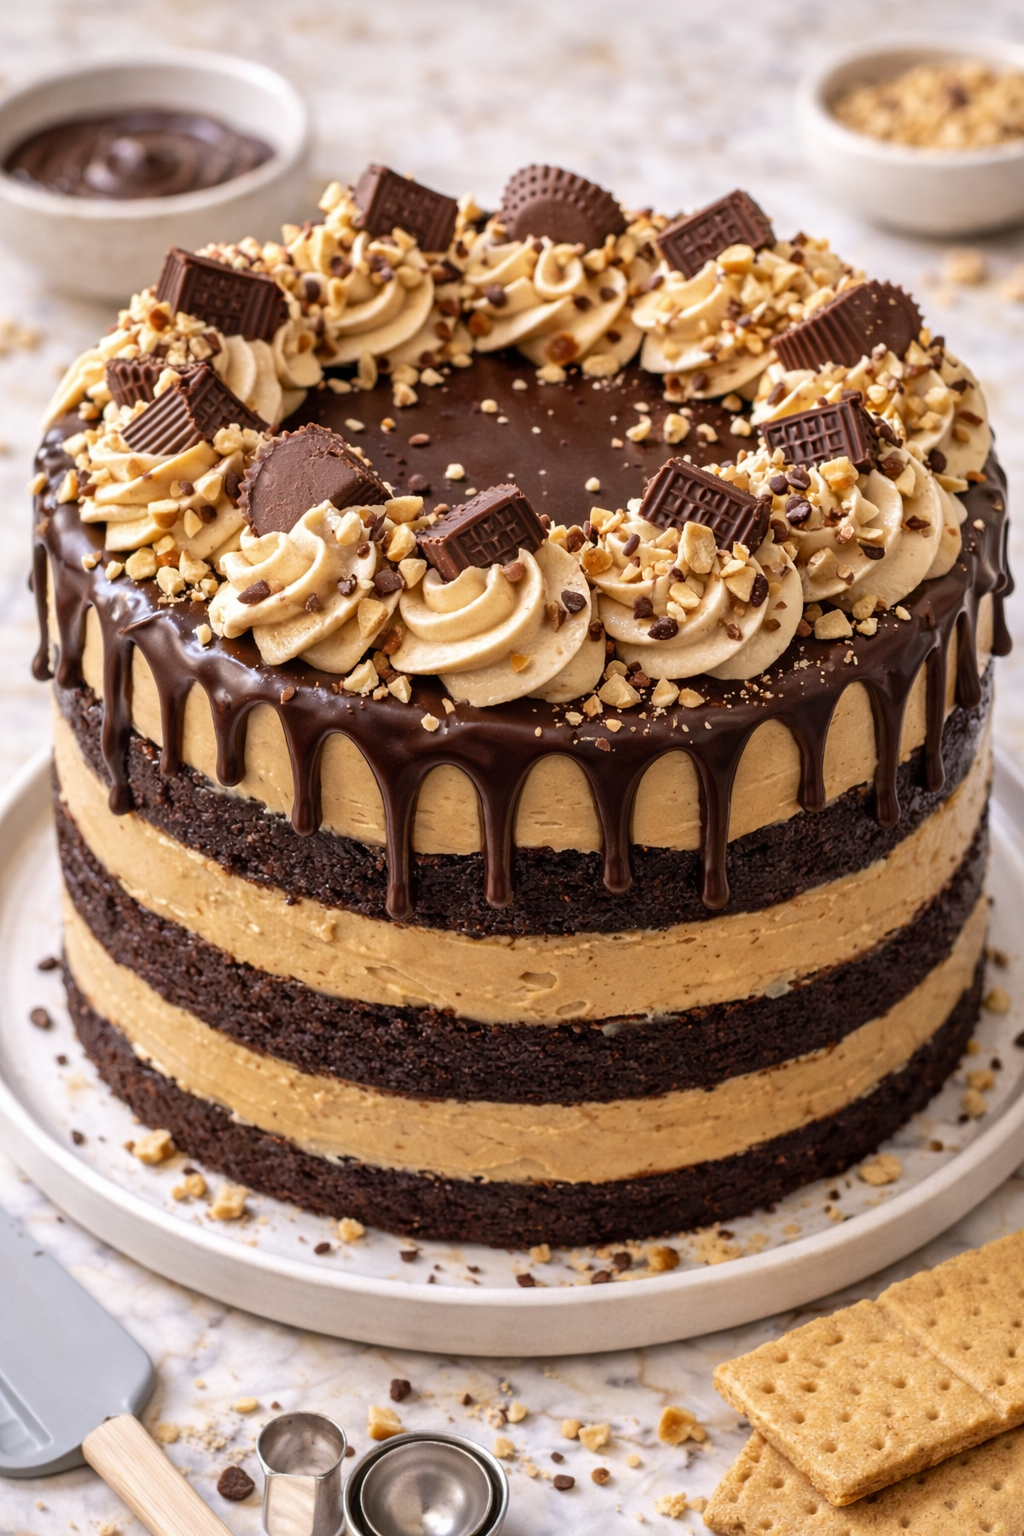
Rich, fudgy chocolate layers. Silky peanut butter frosting. A glossy chocolate ganache drip that makes it look like it came straight out of a bakery window. And the most shocking part? It’s not even that hard to make.
Seriously. You don’t need to be a pastry chef. You don’t need any fancy equipment. You just need a few hours, a mixing bowl, and a very strong will not to eat the frosting straight from the spatula. (No promises on that last one.)
This recipe has become my go-to for birthdays, dinner parties, and honestly just random Tuesdays when life feels like it needs a little celebrating. And once you make it once, you’ll completely understand why.
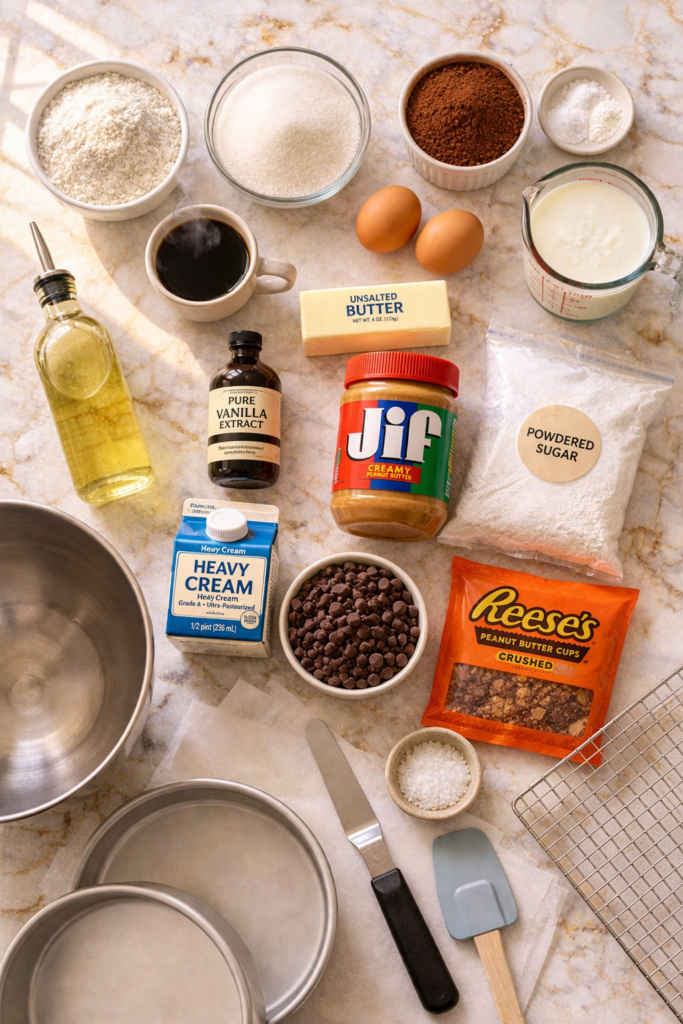
What You’ll Need
For the Chocolate Cake Layers
- 2 cups (250g) all-purpose flour
- 2 cups (400g) granulated sugar
- ¾ cup (75g) unsweetened cocoa powder
- 2 tsp baking soda
- 1 tsp baking powder
- 1 tsp fine sea salt
- 2 large eggs, room temperature
- 1 cup (240ml) buttermilk, room temperature
- 1 cup (240ml) hot strong black coffee (trust me on this)
- ½ cup (120ml) vegetable oil
- 2 tsp vanilla extract
For the Peanut Butter Frosting
- 1½ cups (390g) creamy peanut butter (not natural/runny)
- 1 cup (225g) unsalted butter, softened
- 3 cups (360g) powdered sugar, sifted
- ⅓ cup (80ml) heavy cream
- 1 tsp vanilla extract
- ¼ tsp salt
For the Chocolate Ganache Drip
- 1 cup (170g) semi-sweet chocolate chips
- ½ cup (120ml) heavy cream
Optional Toppings
- Crushed Reese’s cups
- Chopped roasted peanuts
- Flaky sea salt
- Chocolate shavings
Tools You’ll Need
| Tool | Why You Need It |
|---|---|
| Two 8-inch round cake pans | Even layers, proper bake time |
| Stand mixer or hand mixer | For that fluffy, cloud-like frosting |
| Mixing bowls (3 sizes) | Batter, frosting, ganache |
| Rubber spatula | Scraping every last bit of batter (critical) |
| Offset spatula | Smooth, clean frosting application |
| Cake turntable | Optional, but it makes frosting so much easier |
| Cooling rack | So your layers don’t sweat and get soggy |
| Parchment paper | For lining the pans — skip this and you’ll regret it |
| Microwave-safe bowl | For the ganache |
| Sifter | Lump-free frosting and batter |
Pro Tips
These are the things I wish someone had told me the first time I made this. Learn from my mistakes. 😄
- Coffee is non-negotiable. I know it sounds weird in a chocolate cake. You won’t taste it at all, but it makes the chocolate flavor about 10x deeper and richer. Hot coffee blooms the cocoa powder. Use it.
- Room temperature ingredients matter more than you think. Cold eggs and buttermilk cause the batter to curdle and bake unevenly. Set them out 30-45 minutes before you start.
- Don’t overmix once the flour goes in. Mix until just combined. Overmixing develops gluten, and you’ll end up with a tough, dense cake instead of a soft, tender one.
- Let your ganache cool before dripping. If it’s too hot, it’ll run all the way down and pool at the bottom. Aim for a consistency like warm honey — it should drip slowly off a spoon.
- Chill your cake between layers. Pop it in the fridge for 20 minutes after adding each layer of frosting. It keeps everything from sliding around and makes the final result look clean and polished.
Substitutions and Variations
You don’t have to follow this recipe to the letter. Here’s how to make it work for your situation:
| Swap | Use Instead |
|---|---|
| Buttermilk | 1 cup whole milk + 1 tbsp white vinegar (let sit 5 min) |
| Vegetable oil | Melted coconut oil or canola oil |
| Creamy peanut butter | Almond butter or sunflower seed butter (nut-free) |
| Heavy cream (frosting) | Full-fat coconut cream |
| Semi-sweet chocolate | Dark chocolate (70%) for a more intense ganache |
| All-purpose flour | 1:1 gluten-free flour blend |
Want to mix it up a little?
- Salted caramel version: Drizzle salted caramel sauce over the top along with the ganache
- Banana PB chocolate: Add a layer of sliced bananas between the cake layers
- Mocha twist: Add 1 tsp espresso powder to the peanut butter frosting
- Mini cupcake version: Bake at 350°F for 18-20 minutes in lined muffin tins
Make Ahead Tips
This cake is genuinely better the next day. The flavors deepen overnight and the frosting sets beautifully.
- Cake layers: Bake up to 2 days ahead, wrap tightly in plastic wrap, store at room temperature
- Peanut butter frosting: Make up to 5 days ahead and refrigerate in an airtight container; re-whip before using
- Ganache: Reheat gently in the microwave in 15-second bursts, stirring between each
- Fully assembled cake: Refrigerate for up to 3 days; bring to room temperature 45 minutes before serving
Nutritional Info + Diet Notes
Here’s a general breakdown per slice (assuming 12 slices):
| Nutrient | Per Slice (approx.) |
|---|---|
| Calories | ~620 kcal |
| Fat | 36g |
| Carbohydrates | 72g |
| Sugar | 52g |
| Protein | 9g |
| Fiber | 3g |
Diet notes:
- Gluten-free: Use a 1:1 GF flour blend
- Dairy-free: Swap butter for vegan butter, heavy cream for coconut cream, and buttermilk for dairy-free milk + vinegar
- Lower sugar: Reduce the powdered sugar in frosting by ½ cup and add an extra tablespoon of heavy cream to maintain consistency

How to Make It
Step 1: Prep Your Pans and Oven
Preheat your oven to 350°F (175°C).
Grease two 8-inch round cake pans, line the bottoms with parchment paper, and grease the parchment too. Don’t skip the parchment — it’s the difference between a cake that slides out perfectly and one that falls apart in the pan.
Step 2: Make the Cake Batter
In a large bowl, whisk together the flour, sugar, cocoa powder, baking soda, baking powder, and salt.
In a separate bowl, whisk together the eggs, buttermilk, oil, and vanilla.
Pour the wet ingredients into the dry and mix until just combined.
Then pour in the hot coffee and mix again. The batter will look thin — that’s completely normal and actually a good sign.
Step 3: Bake
Divide the batter evenly between the two prepared pans.
Bake for 30-35 minutes, or until a toothpick inserted in the center comes out clean (a few moist crumbs are fine; wet batter is not).
Let the cakes cool in the pans for 10 minutes, then flip them onto a wire rack and cool completely. This usually takes about 1-2 hours. Do not rush this step — frosting a warm cake is a disaster.
Step 4: Make the Peanut Butter Frosting
Beat the butter on medium-high speed for 3 minutes until pale and fluffy.
Add the peanut butter and beat for another 2 minutes.
Add the sifted powdered sugar one cup at a time, alternating with splashes of heavy cream. Beat until light and smooth.
Add the vanilla and salt, and mix for one final minute. If the frosting is too thick, add a little more cream. Too thin? Add more powdered sugar.
Step 5: Make the Ganache
Heat the heavy cream in a microwave-safe bowl until just simmering (about 60-90 seconds).
Pour it over the chocolate chips and let it sit for 2 minutes without stirring.
Then stir from the center outward until silky smooth.
Let it cool at room temperature for 15-20 minutes before dripping.
Step 6: Assemble
Place one cake layer on your serving plate or turntable.
Spread a generous layer of peanut butter frosting on top.
Add the second cake layer and apply a thin crumb coat (a thin layer of frosting that seals in the crumbs) all over the cake. Refrigerate for 20 minutes.
Apply the final, thick layer of frosting using an offset spatula. Take your time here — a slow turntable and smooth strokes are your best friends.
Pour the ganache over the top of the cake and gently nudge it to the edges to create those gorgeous drips down the sides.
Finish with your toppings — crushed Reese’s cups, flaky sea salt, chocolate shavings — whatever makes your heart happy.
Leftovers and Storage
| Storage Method | How Long It Lasts |
|---|---|
| Room temperature (covered) | Up to 2 days |
| Refrigerator (airtight container) | Up to 5 days |
| Freezer (wrapped tightly, no toppings) | Up to 3 months |
To freeze: Wrap individual slices in plastic wrap, then in foil, and place in a zip-lock freezer bag. Thaw overnight in the fridge or at room temperature for 2 hours.
To serve from cold: Always let the cake come to room temperature before eating. Cold peanut butter frosting is firm and dense. Room temperature peanut butter frosting is dreamy.
FAQ
Can I use natural peanut butter for the frosting?
You can, but it’s a gamble. Natural peanut butter is oilier and less stable, which can make the frosting greasy or cause it to separate. Stick with a standard commercial peanut butter like Jif or Skippy for the most consistent result.
Why does my cake sink in the middle?
A few possibilities: the oven wasn’t fully preheated, you opened the oven door too early, or the batter was overmixed. Bake it on the center rack and resist checking it before the 30-minute mark.
Can I make this as a sheet cake instead?
Absolutely. Use a 9×13 inch pan and bake at 350°F for 35-40 minutes. You won’t get the layered look, but it’s just as delicious and a lot less work.
Can I use Dutch-process cocoa instead of regular cocoa powder?
Yes. Dutch-process gives the cake a slightly darker color and smoother chocolate flavor. Just know that it reacts differently with leavening agents — if you switch, reduce your baking soda to 1½ tsp.
My ganache is too thick to drip. What do I do?
Warm it up in 10-second microwave bursts, stirring in between, until it loosens up. If it’s too thin and runny, let it sit at room temperature for another 10 minutes.
Can I add a third cake layer?
Yes! Make 1.5x the batter and divide between three pans. You’ll want to make extra frosting too, or it’ll come up short.
Wrapping Up
This cake is one of those recipes you’ll make once and then never stop thinking about. It’s the kind of thing that gets requested at every gathering, that people ask you for the recipe the second they take a bite.
And yes, it takes a couple of hours. But there is something quietly satisfying about making something this good from scratch, watching it come together layer by layer, and then setting it down on a table and watching people’s faces.
That part never gets old.
Give it a try, and then come back and tell me how it went in the comments. Did you add any of the optional toppings? Any tweaks you made? I genuinely love hearing how these turn out in other people’s kitchens.
Questions too — drop them below. I read every single one. 🍫