You know that feeling when the first cool breeze hits and suddenly all you want is something warm, sweet, and ridiculously cozy?
That’s exactly what these gluten-free apple cinnamon crumble bars deliver.
I’m talking about buttery, crumbly shortbread on the bottom, a thick layer of spiced cinnamon apples in the middle, and an absurdly good streusel topping that gets all golden and crispy in the oven. The texture combo alone will have you reaching for seconds before you’ve even finished your first piece.
And here’s the thing: most people won’t even realize these are gluten-free. I’ve served them to gluten-eating friends who asked for the recipe immediately.
They’re perfect for fall potlucks, Sunday brunches, or when you just need something comforting after a long day. Plus, they make your whole house smell like a fall candle, which is honestly reason enough to bake them.
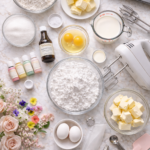
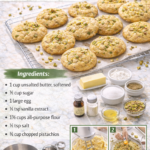
What You’ll Need
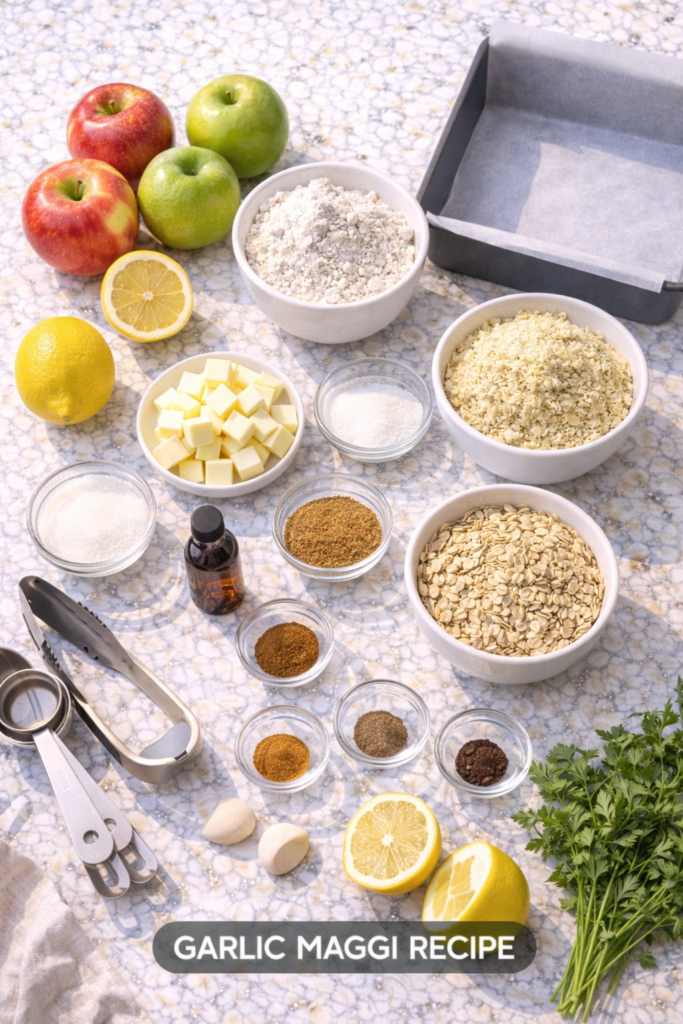
For the Base:
- 1 ½ cups gluten-free all-purpose flour blend (I use Bob’s Red Mill 1-to-1)
- ½ cup almond flour
- ½ cup granulated sugar
- ¾ cup cold unsalted butter, cubed
- ½ teaspoon salt
- 1 teaspoon vanilla extract
For the Apple Filling:
- 4 medium apples (Granny Smith and Honeycrisp work great), peeled and diced
- ⅓ cup brown sugar
- 2 tablespoons gluten-free all-purpose flour
- 1 ½ teaspoons ground cinnamon
- ¼ teaspoon ground nutmeg
- ⅛ teaspoon ground cloves
- 1 tablespoon lemon juice
- 1 teaspoon vanilla extract
For the Crumble Topping:
- ¾ cup gluten-free all-purpose flour
- ¼ cup almond flour
- ½ cup brown sugar
- ½ cup old-fashioned gluten-free rolled oats
- 1 teaspoon cinnamon
- ½ cup cold unsalted butter, cubed
- Pinch of salt
Tools You’ll Need
You don’t need anything fancy for these bars. Just grab:
- 9×9 inch baking pan
- Parchment paper
- Large mixing bowl
- Medium mixing bowl
- Pastry cutter or fork
- Sharp knife
- Cutting board
- Measuring cups and spoons
- Wooden spoon or spatula
Pro Tips
1. Don’t skip the almond flour. It adds moisture and richness that keeps these bars from getting dry or crumbly in a bad way. If you can’t do almonds, try oat flour instead.
2. Keep your butter cold. Room temperature butter will make your crumble greasy instead of perfectly crispy. I literally keep mine in the freezer for 10 minutes before I start.
3. Use a mix of apple varieties. Granny Smith apples hold their shape and add tartness, while Honeycrisp or Gala apples bring sweetness. The combo is chef’s kiss.
4. Line your pan with parchment paper. Trust me on this. It makes getting the bars out so much easier, and you won’t be scraping bits off the pan later.
5. Let them cool completely before cutting. I know it’s torture to wait, but warm bars will fall apart. Give them at least an hour to set up properly.
How to Make Gluten-Free Apple Cinnamon Crumble Bars

Step 1: Prep Your Pan
Preheat your oven to 350°F. Line your 9×9 inch pan with parchment paper, leaving some overhang on the sides so you can lift the bars out later.
Step 2: Make the Base
In a large bowl, mix together the gluten-free flour, almond flour, sugar, and salt. Add the cold cubed butter and use a pastry cutter (or two forks) to work it into the flour until it looks like coarse crumbs. Stir in the vanilla extract.
Press about ⅔ of this mixture firmly into the bottom of your prepared pan. Really pack it down. Pop it in the oven for 15 minutes until it’s just starting to turn golden.
Step 3: Prepare the Apple Filling
While the base is baking, peel and dice your apples into small chunks (about ½ inch pieces work great). Toss them in a medium bowl with the brown sugar, flour, cinnamon, nutmeg, cloves, lemon juice, and vanilla. Mix until all the apples are coated.
The lemon juice keeps the apples from browning and adds a little brightness that balances the sweetness.
Step 4: Make the Crumble Topping
In another bowl, combine the gluten-free flour, almond flour, brown sugar, oats, cinnamon, and salt. Cut in the cold butter until you get those perfect pea-sized crumbles. Set it aside.
Step 5: Assemble Everything
Once your base is out of the oven, spread the apple mixture evenly over it. Then take that remaining base mixture you saved and the crumble topping, and sprinkle them both over the apples. You want good coverage, but it’s fine if some apple peeks through.
Step 6: Bake
Bake for 40-45 minutes until the top is golden brown and you can see the apple filling bubbling around the edges. The smell at this point will be absolutely ridiculous.
Step 7: Cool and Cut
This is the hardest part. Let the bars cool completely in the pan. I usually give mine at least an hour, sometimes two. Use the parchment overhang to lift the whole thing out, then cut into 9 or 12 squares depending on how generous you’re feeling.
Substitutions and Variations
Can’t do dairy? Swap the butter for vegan butter or coconut oil. The texture will be slightly different, but still delicious.
Don’t have almond flour? Use more gluten-free all-purpose flour or try oat flour for a nuttier flavor.
Want to add nuts? Toss ½ cup of chopped pecans or walnuts into the crumble topping. So good.
Make them extra indulgent: Drizzle with caramel sauce or serve with vanilla ice cream while they’re still slightly warm.
Try different fruits: Pears work beautifully with the same spice blend. You could also do a mix of apples and cranberries for a more tart version.
Adjust the sweetness: If your apples are super sweet, cut the brown sugar in the filling down to ¼ cup.
Make Ahead Tips
These bars are actually better the next day after all the flavors have had time to meld together.
You can make them up to 2 days ahead and store them covered at room temperature. They also freeze really well.
To freeze: Cut them into individual bars, wrap each one in plastic wrap, then store in a freezer bag for up to 3 months. Let them thaw at room temperature for an hour before eating.
You can also prep the base and crumble topping a day ahead, keep them in the fridge, and just assemble and bake when you’re ready.
Leftovers and Storage
Store leftover bars in an airtight container at room temperature for up to 4 days. If you want them to last longer, keep them in the fridge for up to a week.
To reheat: Pop a bar in the microwave for 15-20 seconds to get that fresh-from-the-oven warmth back. Or warm them in a 300°F oven for 10 minutes.
Pro move: Warm bar + vanilla ice cream = instant fall dessert that looks like you tried way harder than you actually did.
Nutritional Information
Per bar (based on 12 servings):
- Calories: 285
- Total Fat: 14g
- Saturated Fat: 8g
- Cholesterol: 35mg
- Sodium: 125mg
- Total Carbohydrates: 38g
- Dietary Fiber: 2g
- Sugars: 22g
- Protein: 3g
Keep in mind these are treats, not health food. But at least they’re gluten-free treats with some fiber from the oats and apples! 😊
Frequently Asked Questions
Q: Can I use regular flour instead of gluten-free?
A: Absolutely! Just swap the gluten-free flour 1:1 with regular all-purpose flour. Everything else stays the same.
Q: My crumble topping isn’t getting crispy. What am I doing wrong?
A: Make sure your butter is really cold when you mix it in. Also, don’t press the crumble down. Just sprinkle it loosely over the apples so it can crisp up properly.
Q: What’s the best gluten-free flour blend to use?
A: I love Bob’s Red Mill 1-to-1 Gluten Free Baking Flour or King Arthur Measure for Measure. Both have xanthan gum already in them, which helps with texture.
Q: Do I have to peel the apples?
A: Not technically, but I recommend it. The peels can get a little tough and chewy after baking. If you leave them on, at least dice your apples extra small.
Q: Can I make these nut-free?
A: Yes! Replace the almond flour with additional gluten-free all-purpose flour or try sunflower seed flour as an alternative.
Q: Why are my bars falling apart when I cut them?
A: They probably haven’t cooled enough. Give them the full cooling time (at least an hour) so the filling can set properly.
Q: Can I double this recipe?
A: Sure can! Use a 9×13 inch pan and bake for an extra 5-10 minutes. Keep an eye on the top so it doesn’t get too dark.
Wrapping Up
These gluten-free apple cinnamon crumble bars are everything fall baking should be: easy, cozy, and absolutely delicious.
They’re simple enough for a weeknight dessert but impressive enough for your next gathering. And the fact that they’re gluten-free? Most people won’t even notice.
Make a batch this weekend and let me know how they turn out! I’d love to hear if you tried any variations or what you served them with. Drop a comment below with your experience or any questions you have about the recipe.