You know that smell that fills your house when cinnamon buns are baking?
That’s the kind of smell that makes you forget you’re wearing yesterday’s sweatpants and haven’t brushed your hair yet. It’s the smell that makes neighbors suddenly remember they need to “borrow sugar.”
I’m not going to lie to you. Making cinnamon buns from scratch takes time. But if you’ve ever paid $6 for a single cinnamon roll at the mall and thought “I could make this at home,” you’re absolutely right. You can. And yours will be better.
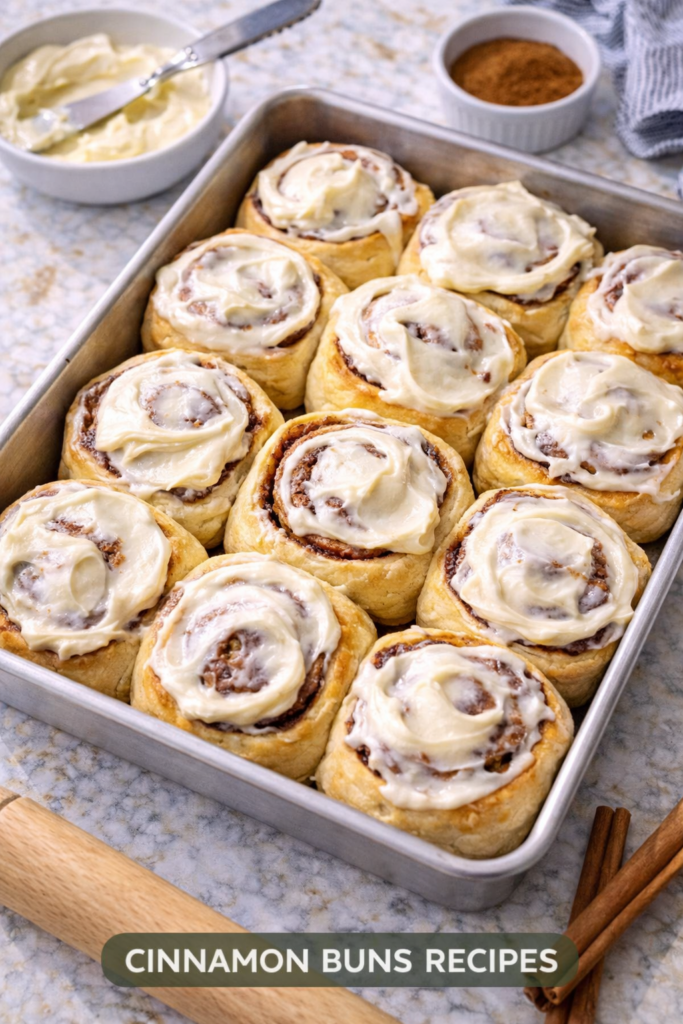
These aren’t those dry, sad cinnamon rolls that need to be drowned in icing just to be edible. These are soft, fluffy, ridiculously gooey cinnamon buns that pull apart in perfect spirals. The kind that are still warm when you eat them and make you close your eyes for a second because they’re just that good.
I’ve been making these for years now, and they’re my go-to whenever I want to feel like I have my life together (even when I don’t). They’re perfect for lazy Sunday mornings, special occasions, or when you just want your house to smell amazing.
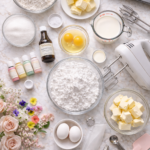
What You’ll Need
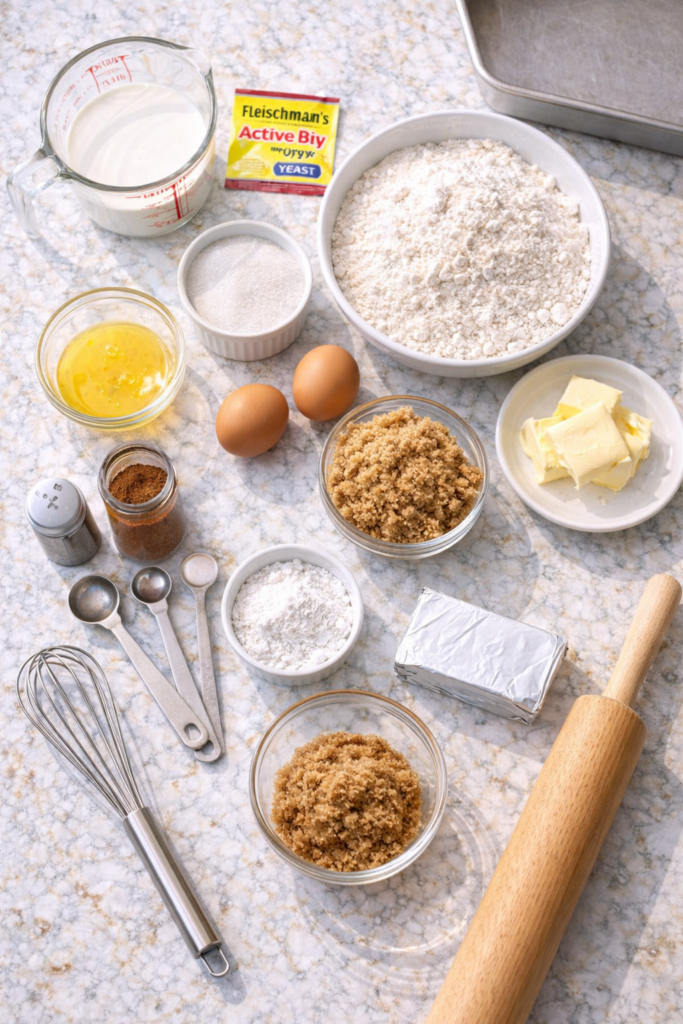
For the Dough:
- 1 cup whole milk, warmed to about 110°F
- 2 ¼ teaspoons active dry yeast (one standard packet)
- ½ cup granulated sugar
- ⅓ cup unsalted butter, melted
- 2 large eggs, room temperature
- 1 teaspoon salt
- 4 ½ cups all-purpose flour
For the Filling:
- ½ cup unsalted butter, softened to room temperature
- 1 cup packed light brown sugar
- 2 ½ tablespoons ground cinnamon
- ¼ teaspoon salt
For the Cream Cheese Frosting:
- 4 ounces cream cheese, softened
- 3 tablespoons unsalted butter, softened
- 1 ½ cups powdered sugar
- ½ teaspoon vanilla extract
- 2-3 tablespoons whole milk
Tools You’ll Need
- Large mixing bowl
- Whisk
- Rolling pin
- 9×13 inch baking pan
- Kitchen towel or plastic wrap
- Pastry brush (or just use your fingers)
- Offset spatula or butter knife for spreading
- Stand mixer with dough hook (optional but makes life easier)
Pro Tips
Let the dough actually rise. I know waiting is boring, but this is where the magic happens. If your dough doesn’t double in size, your buns won’t be fluffy. Find a warm spot in your kitchen. I usually turn my oven on for 2 minutes, turn it off, and let my dough rise in there.
Room temperature ingredients matter. Cold eggs and butter don’t mix well with yeast dough. Take your eggs out of the fridge 30 minutes before you start. If you forgot (we’ve all been there), put them in a bowl of warm water for 5 minutes.
Don’t skimp on the cinnamon filling. Spread that butter all the way to the edges. Every single inch. This is not the time to be conservative. You want cinnamon in every bite, not just the middle.
Use dental floss to cut the rolls. I’m serious. Slide unflavored dental floss under your rolled dough, cross the ends over the top, and pull. Clean cuts every single time. No squishing, no mess. Your grandmother’s trick was right all along.
Make them the night before. After you’ve cut the rolls and placed them in the pan, cover them tightly and stick them in the fridge overnight. In the morning, let them sit at room temperature for 30 minutes while your oven preheats. Fresh cinnamon buns without the morning effort? Yes please.
Substitutions and Variations
Dairy-free? Use oat milk or almond milk instead of regular milk, and swap the butter for vegan butter. Skip the cream cheese frosting and make a simple glaze with powdered sugar and plant milk.
Want them extra gooey? Pour ¼ cup of heavy cream over the rolls right before baking. The cream seeps into all the layers and creates the most ridiculous gooey texture.
Add-ins that work: Chopped pecans or walnuts in the filling. Raisins if you’re into that (I’m not, but you do you). A handful of chocolate chips never hurt anyone.
Different flavors: Replace half the cinnamon with cardamom for a Swedish twist. Add orange zest to the dough and filling for orange cinnamon rolls. Mix in some espresso powder with the cinnamon for a coffee shop vibe.
Make Ahead Tips
These buns are actually perfect for making ahead, which is why I love them for special occasions.
Option 1: Refrigerate overnight. Make the dough, fill it, cut it, arrange in the pan. Cover tightly with plastic wrap and refrigerate up to 24 hours. Let sit at room temperature 30-45 minutes before baking.
Option 2: Freeze unbaked. Same process as above, but freeze instead of refrigerate. They’ll keep for up to 3 months. Thaw overnight in the fridge, then bring to room temperature before baking.
Option 3: Bake and freeze. Bake the rolls, let them cool completely, wrap individually, and freeze for up to 2 months. Microwave for 30-45 seconds when you want one.
How to Make Cinnamon Buns
Step 1: Wake up the yeast
Pour your warm milk into a large bowl. It should feel like bathwater on your wrist. Too hot and you’ll kill the yeast. Too cold and nothing will happen.
Sprinkle the yeast over the milk and add a pinch of sugar. Let it sit for 5-10 minutes until it gets foamy on top. If nothing happens, your yeast is dead. Start over with fresh yeast.
Step 2: Make the dough
Once your yeast is foamy and alive, whisk in the sugar, melted butter, eggs, and salt.
Add the flour one cup at a time, mixing after each addition. When the dough starts to come together, switch to your hands or a dough hook.
Knead the dough for about 8-10 minutes by hand, or 5-6 minutes with a stand mixer. You want it smooth and elastic. It should be slightly sticky but not leaving dough all over your hands.
Step 3: First rise
Form the dough into a ball and place it in a greased bowl. Turn it once so the top is greased too.
Cover with a kitchen towel or plastic wrap and let it rise in a warm place for 1-1.5 hours, until doubled in size. You should be able to poke it and the indent stays.
Step 4: Roll it out
Punch down the dough (this is the fun part) and turn it out onto a lightly floured surface.
Roll it into a 12×18 inch rectangle. Try to keep the edges as straight as possible. This makes rolling and cutting easier.
Step 5: Add the filling
Spread the softened butter all over the dough, leaving a ½ inch border along one long edge.
Mix together the brown sugar, cinnamon, and salt. Sprinkle this mixture evenly over the butter. Press it down gently with your hands so it sticks.
Step 6: Roll it up
Starting from the long edge with filling all the way to the edge, roll the dough up tightly. Keep the roll even and tight as you go.
When you reach the end, pinch the seam to seal it. Place the roll seam-side down.
Step 7: Cut the rolls
Use that dental floss trick I mentioned. Cut the log into 12 equal pieces, about 1.5 inches each.
Place them in a greased 9×13 pan, leaving a little space between each one. They’ll expand and touch each other while baking, which is perfect.
Step 8: Second rise
Cover the pan with a towel and let the rolls rise again for 30-45 minutes. They should look puffy and have nearly doubled.
While they’re rising, preheat your oven to 350°F.
Step 9: Bake
Bake for 20-25 minutes, until the tops are golden brown. Don’t overbake them or they’ll be dry.
Let them cool in the pan for about 10 minutes. This is torture because they smell amazing, but you need to let them set a bit.
Step 10: Make the frosting and serve
While the buns are cooling slightly, beat together the cream cheese and butter until smooth.
Add the powdered sugar and vanilla, beating until combined. Add milk one tablespoon at a time until you reach your desired consistency. I like mine spreadable but not runny.
Spread the frosting over the warm (not hot) buns. Watch it melt into all those cinnamon swirls.
Serve immediately and try not to eat three in one sitting. I said try.
Leftovers and Storage
Room temperature: Keep them covered at room temperature for up to 2 days. They’ll stay soft if you cover them well.
Refrigerator: Store in an airtight container for up to 5 days. Microwave for 15-20 seconds to warm them up.
Freezer: Wrap individual buns in plastic wrap, then place in a freezer bag. They’ll keep for up to 3 months. Thaw at room temperature or microwave from frozen for 45-60 seconds.
Reheating tip: Wrap in a damp paper towel before microwaving. This keeps them from drying out. Or warm them in a 300°F oven for 5-10 minutes if you want that fresh-baked feel again.
FAQ
Why didn’t my dough rise?
Your yeast was probably dead. Check the expiration date. Or your milk was too hot and killed it. Or your kitchen was too cold. Yeast is picky and likes warmth, but not too much.
Can I use instant yeast instead of active dry?
Yes. You don’t need to activate it first. Just mix it right in with your dry ingredients and continue with the recipe.
My rolls came out dry. What happened?
You probably overbaked them or measured your flour wrong. Use the spoon-and-level method, not scooping directly from the bag. That packs in too much flour.
Can I make these without a stand mixer?
Absolutely. I made these by hand for years. Your arms will get a workout, but it’s totally doable. Just knead for a few extra minutes.
How do I know when they’re done baking?
The tops should be golden brown and the internal temperature should be around 190°F if you have a thermometer. If you don’t, the golden brown top is your best guide.
Can I use salted butter?
You can, but reduce the added salt in the recipe. I prefer unsalted so I can control the saltiness.
Why is my filling leaking out?
You didn’t seal the seam well enough, or you rolled them too loosely. Make sure to pinch that seam and roll them snugly but not so tight that the dough tears.
Do I have to use cream cheese frosting?
Nope. Make a simple glaze with powdered sugar and milk. Or use a buttercream frosting. Or eat them plain. They’re good enough to stand on their own.
Wrapping Up
These cinnamon buns take a bit of time, but they’re worth every minute.
There’s something really satisfying about making something from scratch that most people buy frozen or pay way too much for at the mall. And when you pull that pan out of the oven and your whole house smells like a bakery, you’ll get it.
Make these for your family. Make them for yourself. Make them because it’s Saturday and you deserve warm cinnamon buns.
And when you do, come back and tell me how they turned out. Did you make them ahead? Did you try any variations? Did your kitchen smell as good as mine did?
Drop a comment below. I want to hear about it.