I’ve tried at least 30 different waffle recipes over the years, and most of them promised “the perfect waffle” but delivered something that was either too dense, too flat, or honestly just tasted like cardboard.
But this one? This is the recipe that finally made me stop searching.
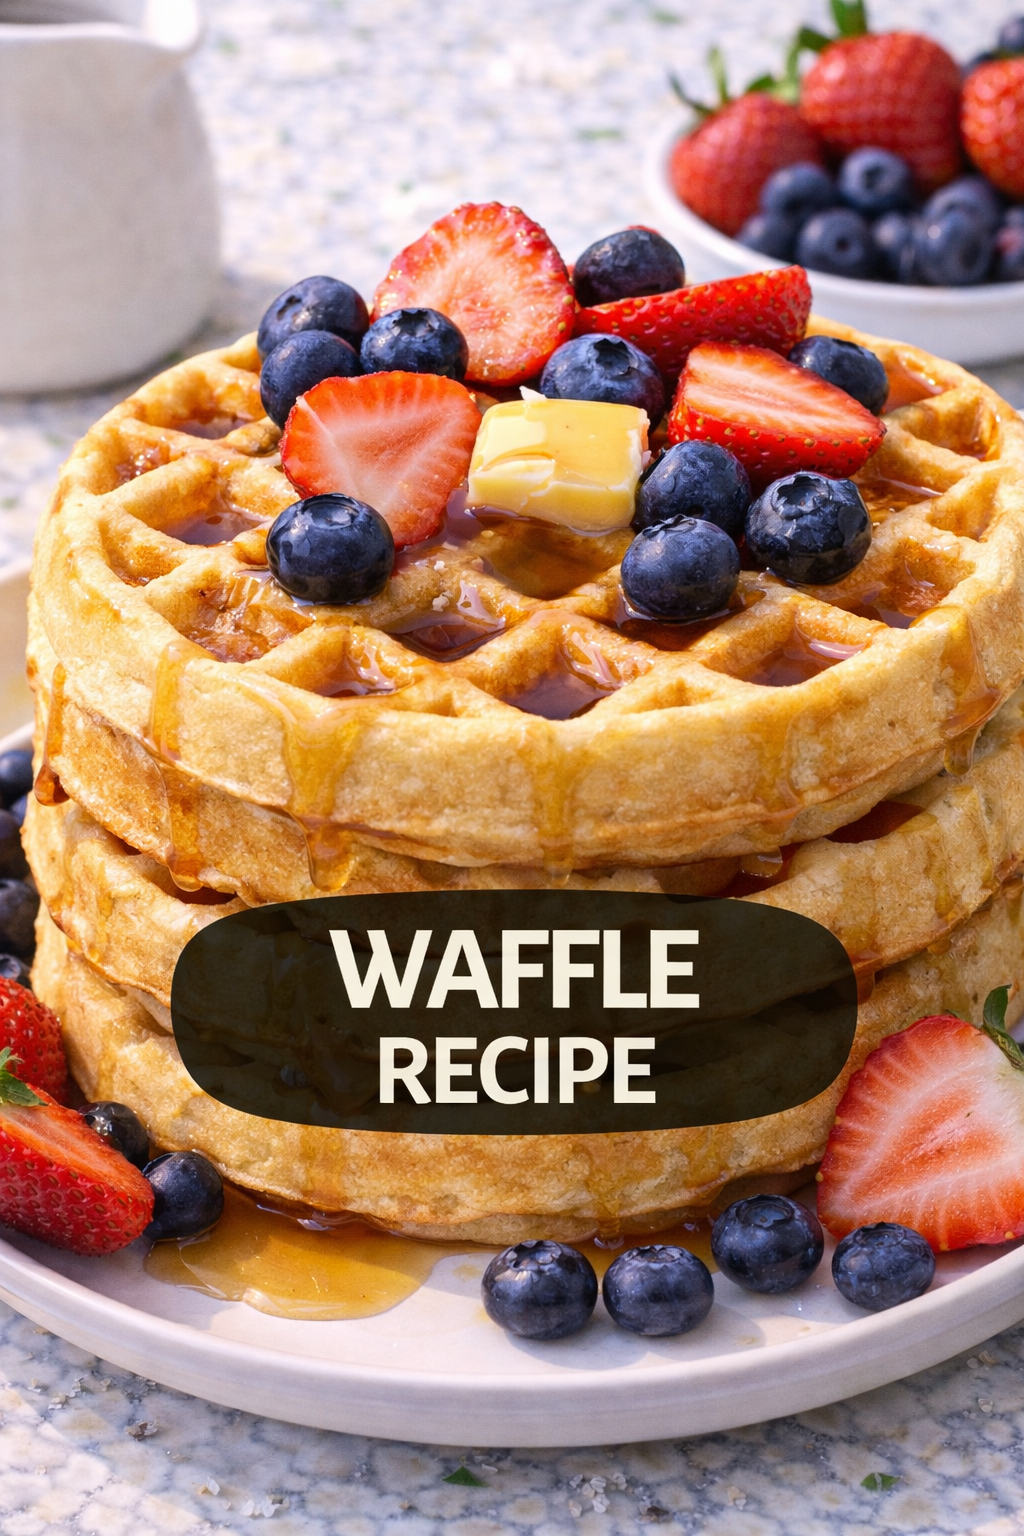
These waffles come out with a golden, crispy exterior that shatters when you bite into it, and the inside stays impossibly light and fluffy. They’re not too sweet, which means they work just as well for breakfast with maple syrup as they do for dinner topped with fried chicken.
I’m talking about waffles that actually hold their shape when you pile on the toppings. No soggy mess five minutes later.
The secret isn’t some complicated technique or hard-to-find ingredient. It’s all about the right ratios and one simple step that most people skip (I’ll get to that in a minute).
So if you’ve been settling for mediocre waffles or relying on that boxed mix in your pantry, it’s time to try something that’ll actually blow your mind. Trust me on this one.
What You’ll Need

For the Waffles:
- 2 cups all-purpose flour
- 2 tablespoons granulated sugar
- 1 tablespoon baking powder
- 1/2 teaspoon salt
- 2 large eggs (separated)
- 1 3/4 cups whole milk
- 1/2 cup unsalted butter (melted and slightly cooled)
- 2 teaspoons pure vanilla extract
- Cooking spray or additional melted butter for the waffle iron
Tools You’ll Need:
- Waffle iron (Belgian-style works great, but any will do)
- Two mixing bowls (one large, one medium)
- Whisk
- Rubber spatula
- Measuring cups and spoons
- Small bowl for egg whites
- Electric mixer or whisk for beating egg whites (optional but helpful)
- Pastry brush (for greasing the waffle iron)
Pro Tips
Separate those egg whites. This is the game-changer that most recipes don’t tell you about. When you beat the egg whites until they’re fluffy and fold them into the batter, you’re creating little air pockets that make your waffles incredibly light. Skip this step and you’ll end up with flat, dense waffles.
Don’t overmix the batter. I know it’s tempting to whisk until everything is perfectly smooth, but resist that urge. A few lumps are totally fine. Overmixing develops the gluten in the flour, which makes your waffles tough and chewy instead of tender.
Let your waffle iron get HOT. I mean seriously hot. Preheat it for at least 5 minutes before you pour in your first batch. A properly heated waffle iron gives you that crispy, golden crust we’re after. If you pour batter into a lukewarm iron, you’ll get pale, soggy waffles.
Use the steam as your guide. Your waffle is done when the steam stops coming out of the waffle iron. This usually takes 4-5 minutes, but every iron is different. Opening it too early will tear your waffle in half, and nobody wants that.
Keep finished waffles warm in the oven. If you’re making a big batch, preheat your oven to 200°F and place finished waffles directly on the oven rack. This keeps them warm AND maintains that crispy exterior. Stacking them on a plate will make them steam and get soggy.
How to Make the Perfect Waffles

Step 1: Mix your dry ingredients
Grab your large mixing bowl and whisk together the flour, sugar, baking powder, and salt. Make sure everything is evenly distributed because nobody wants a bite of pure baking powder. Set this aside.
Step 2: Separate your eggs
Crack those eggs and carefully separate the whites from the yolks. Put the yolks in your medium mixing bowl and the whites in a small bowl. This is where the magic happens, so don’t skip this step.
Step 3: Combine the wet ingredients
Add the milk, melted butter, and vanilla extract to the bowl with your egg yolks. Whisk it all together until it’s well combined. The mixture should be smooth and a light yellow color.
Step 4: Beat those egg whites
Using an electric mixer or a whisk (and some arm strength), beat the egg whites until they form soft peaks. You’ll know they’re ready when you lift the beater and the peaks droop over slightly instead of standing straight up. This takes about 2-3 minutes with an electric mixer.
Step 5: Combine wet and dry
Pour your wet ingredients into the bowl with the dry ingredients. Use a rubber spatula to gently fold everything together. Stop mixing when you still see a few streaks of flour. Remember, lumpy batter is your friend here.
Step 6: Fold in the egg whites
This is the crucial part. Add about a third of the beaten egg whites to your batter and gently fold them in using a rubber spatula. Use a gentle scooping motion from the bottom of the bowl, bringing the batter up and over the egg whites.
Once that’s incorporated, add the remaining egg whites and fold again. Be gentle. You want to keep as much air in there as possible.
Step 7: Preheat your waffle iron
Turn your waffle iron to medium-high heat and let it preheat for at least 5 minutes. When it’s ready, lightly grease it with cooking spray or brush it with melted butter.
Step 8: Cook your waffles
Pour the batter into the center of your waffle iron. The amount will depend on your iron size, but for a standard Belgian waffle maker, about 3/4 cup works perfectly. Close the lid and resist the urge to peek.
Cook until the steam stops escaping from the sides. This usually takes 4-5 minutes, but it varies by iron. The waffle should be golden brown and crispy when you open it.
Step 9: Repeat
Remove the finished waffle and place it in your preheated oven to keep warm (or serve immediately if you can’t wait). Repeat with the remaining batter.
You should get about 6-8 waffles depending on the size of your iron.
Substitutions and Variations
Buttermilk waffles: Swap the whole milk for buttermilk to add a slight tang and extra fluffiness. The acidity in buttermilk reacts with the baking powder to create even more lift.
Whole wheat waffles: Replace up to half of the all-purpose flour with whole wheat flour for a heartier, nuttier flavor. Going beyond half makes them too dense.
Dairy-free option: Use your favorite plant-based milk (oat or almond work great) and replace the butter with melted coconut oil or a dairy-free butter alternative.
Add-ins: Fold in 1/2 cup of chocolate chips, blueberries, or chopped pecans right before cooking. Just don’t go overboard or the waffles won’t cook evenly.
Savory waffles: Cut the sugar down to 1 teaspoon and add 1/4 cup of shredded cheese and a pinch of black pepper to the batter. These are incredible topped with fried chicken or a fried egg.
Cinnamon sugar waffles: Add 1 teaspoon of cinnamon to your dry ingredients and increase the sugar to 3 tablespoons.
Lemon waffles: Add 1 tablespoon of lemon zest to the batter for a bright, fresh flavor that pairs beautifully with berries.
Make Ahead Tips
Prep the dry ingredients: You can whisk together all the dry ingredients the night before and store them in an airtight container. In the morning, just add the wet ingredients and you’re halfway done.
Make the batter ahead (sort of): While I don’t recommend making the full batter ahead because the beaten egg whites will deflate, you can prep everything except beating and folding in the egg whites. Mix your dry ingredients in one bowl and your wet ingredients (minus the egg whites) in another. Store them separately in the fridge overnight. In the morning, bring the wet ingredients to room temperature, beat the egg whites, combine everything, and cook.
Freeze cooked waffles: These freeze beautifully. Let them cool completely on a wire rack, then place them in a single layer on a baking sheet and freeze for 1 hour. Transfer to a freezer bag with parchment paper between each waffle. They’ll keep for up to 3 months.
Reheat from frozen: Pop frozen waffles directly into your toaster or toaster oven. They’ll crisp up perfectly in about 3-4 minutes. You can also reheat them in a 350°F oven for 5-7 minutes.
Leftovers and Storage
Room temperature: If you’re planning to eat leftover waffles within a few hours, you can leave them out covered with a clean kitchen towel. They’ll stay relatively crispy this way.
Refrigerator: Store cooled waffles in an airtight container with parchment paper between each one to prevent sticking. They’ll keep for 3-4 days in the fridge.
Reheating refrigerated waffles: The toaster is your best friend here. It brings back that crispy exterior better than anything else. Pop them in for 2-3 minutes until they’re heated through and crispy.
Avoid the microwave: Seriously. The microwave makes waffles soggy and rubbery. If you absolutely have to use it, place the waffle on a paper towel and microwave for just 20-30 seconds, then finish it in the toaster to crisp it back up.
Topping Ideas
Classic waffles are great, but the toppings are where you can really get creative.
Sweet options: Maple syrup and butter (the classic for a reason), fresh berries with whipped cream, Nutella and sliced bananas, peanut butter and honey, caramelized apples with cinnamon, lemon curd and fresh raspberries, or vanilla ice cream with hot fudge.
Savory options: Fried chicken and hot honey, scrambled eggs with bacon and cheese, smoked salmon with cream cheese and capers, pulled pork with coleslaw, or a fried egg with avocado and sriracha.
Nutritional Information (Per Waffle)
- Calories: 245
- Total Fat: 11g
- Saturated Fat: 6g
- Cholesterol: 75mg
- Sodium: 285mg
- Total Carbohydrates: 30g
- Dietary Fiber: 1g
- Sugars: 5g
- Protein: 6g
Note: Nutritional values are approximate and based on 8 waffles. Actual values may vary based on specific ingredients and waffle size.
FAQ
Can I make these without separating the eggs?
You can, but you’ll sacrifice the incredible light and fluffy texture. Just whisk the whole eggs into the wet ingredients. The waffles will still taste good, but they’ll be denser and less crispy.
My batter seems too thick. Is that normal?
The batter should be thick but pourable. If it’s so thick that it won’t spread in the waffle iron, add milk 1 tablespoon at a time until it reaches the right consistency. Keep in mind that the beaten egg whites will make it lighter.
Can I use this batter for pancakes?
You can, but the texture will be different because of the beaten egg whites and higher butter content. For pancakes, I’d recommend finding a recipe specifically designed for them.
Why are my waffles sticking to the iron?
This usually means you didn’t grease the iron enough or it wasn’t hot enough when you poured in the batter. Make sure to preheat thoroughly and grease generously before each waffle.
Can I double this recipe?
Absolutely! Just keep in mind that beaten egg whites start to deflate after about 30 minutes, so if you’re making a huge batch, you might want to beat and fold in the egg whites in two separate batches.
My waffles aren’t crispy. What am I doing wrong?
A few things could be the culprit. Your waffle iron might not be hot enough, you might be opening it too soon, or you’re stacking the finished waffles on top of each other (which steams them and makes them soggy). Try preheating longer and keeping finished waffles in a warm oven on a rack instead of stacking them.
Can I use melted margarine instead of butter?
You can, but the flavor won’t be nearly as good. Butter adds a richness that margarine just can’t match. If you’re looking for a dairy-free option, coconut oil is a better substitute.
How do I know when the waffle is done?
Watch for the steam. When the steam stops coming out of the waffle iron, your waffle is done. Most irons also have an indicator light, but the steam method is more reliable.
Wrapping Up
There you have it. Waffles that are crispy on the outside, fluffy on the inside, and actually worth getting out of bed for.
The best part? Once you’ve made these a few times, the whole process becomes second nature. You can whip up a batch in less than 30 minutes, which makes them perfect for lazy Sunday mornings or even a quick weeknight breakfast-for-dinner situation.
I’d love to hear how yours turn out! Drop a comment below and let me know if you tried any of the variations or if you discovered your own favorite topping combination.
And if you have any questions about the recipe, I’m here to help. Happy waffle making! 🧇