
You know that feeling when you bite into something and your brain just… stops for a second?
That’s exactly what happens with these chocolate peanut butter bars.
They’re cold, rich, and fudgy. The peanut butter layer is thick and creamy. The chocolate on top sets into this perfectly snappable shell. And the whole thing comes together in about 20 minutes of actual work.
No oven. No complicated technique. No pastry school required.
Here’s the kicker: people will genuinely think you spent hours making these. I’ve brought them to potlucks, gifted them during the holidays, and made them on a Tuesday just because I could. They disappear every single time.
So if you’ve been looking for a dessert that delivers serious “wow” for almost zero effort, keep reading.
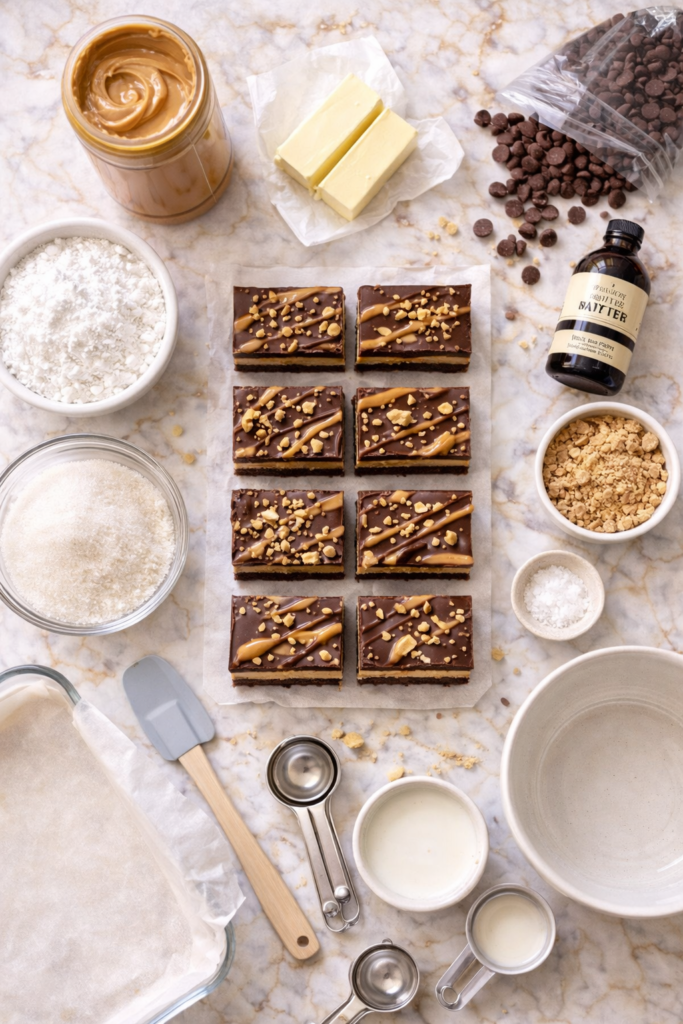
What You’ll Need
For the Peanut Butter Base
- 1½ cups creamy peanut butter (not natural/runny style)
- ½ cup unsalted butter, melted
- 2 cups powdered sugar
- 1½ cups graham cracker crumbs (about 12 full crackers)
- 1 tsp pure vanilla extract
- ¼ tsp fine sea salt
For the Chocolate Top Layer
- 2 cups semi-sweet chocolate chips
- ½ cup creamy peanut butter (reserved)
A quick note on peanut butter: Brands like Jif or Skippy work best here. Natural peanut butter (the kind where the oil separates) makes the base too soft and the bars won’t hold their shape. I learned this the hard way. 😅
Tools You’ll Need
- 9×13 inch baking pan
- Parchment paper (for easy lift-out)
- Large mixing bowl
- Medium microwave-safe bowl
- Rubber spatula or wooden spoon
- Sharp knife for slicing
- Measuring cups and spoons
Pro Tips
These are the things I wish someone had told me before the first batch:
- Use room temperature butter. If your melted butter is too hot when you mix it with the peanut butter, things get greasy and the base won’t bind properly. Let it cool for 5 minutes first.
- Press the base in firmly. Use the bottom of a flat measuring cup to really pack the peanut butter layer down. If it’s loose, the bars crumble when you cut them.
- Don’t skip the peanut butter in the chocolate layer. It keeps the topping from cracking into a dozen pieces when you slice it. That’s the secret to those clean, sharp edges you see in food photos.
- Score the chocolate before it fully sets. About 30 minutes into chilling, lightly run a knife through the top chocolate layer. This prevents ugly cracks when you cut later.
- Chill overnight if you can. They’re technically ready in 2 hours, but overnight? The texture is so much better. More fudgy, more firm, cleaner cuts.
Instructions
Prep time: 20 minutes | Chill time: 2 hours (overnight preferred) | Servings: 24 bars
Step 1: Prep Your Pan
Line your 9×13 pan with parchment paper, leaving some overhang on the sides. This is how you’ll lift the whole slab out cleanly later.
Step 2: Make the Peanut Butter Base
In a large bowl, mix together 1½ cups peanut butter, melted butter, powdered sugar, graham cracker crumbs, vanilla extract, and sea salt.
Stir until a thick, slightly crumbly dough forms. It should look like very thick cookie dough.
Step 3: Press Into the Pan
Transfer the mixture into your lined pan and press it down into an even, flat layer.
Use the flat bottom of a measuring cup to pack it down firmly. The surface should be smooth and compact, not crumbly.
Step 4: Make the Chocolate Layer
In a microwave-safe bowl, combine 2 cups of chocolate chips and the remaining ½ cup of peanut butter.
Microwave in 30-second intervals, stirring between each, until completely smooth. It usually takes about 1.5 to 2 minutes total.
Step 5: Pour and Spread
Pour the chocolate mixture over the peanut butter base and spread it out evenly with a spatula.
Give the pan a few gentle taps on the counter to even out the surface and release any air bubbles.
Step 6: Score + Chill
After 30 minutes in the fridge, lightly run your knife through the chocolate to pre-score bar shapes. Don’t cut all the way through yet.
Refrigerate for at least 2 hours (or overnight) until completely firm.
Step 7: Slice and Serve
Lift the whole slab out using the parchment paper. Place on a cutting board and slice into bars along your scored lines.
Serve cold, straight from the fridge.
Substitutions and Variations
Don’t have every ingredient on hand? Here’s what works:
| Ingredient | Substitution |
|---|---|
| Graham cracker crumbs | Crushed Oreos (without filling), digestive biscuits, or pretzels |
| Semi-sweet chocolate chips | Dark chocolate chips, milk chocolate chips, or chopped chocolate bars |
| Unsalted butter | Salted butter (just skip the added salt) |
| Powdered sugar | Can’t substitute easily – it’s key to the texture |
| Creamy peanut butter | Almond butter or sunflower seed butter (nut-free option) |
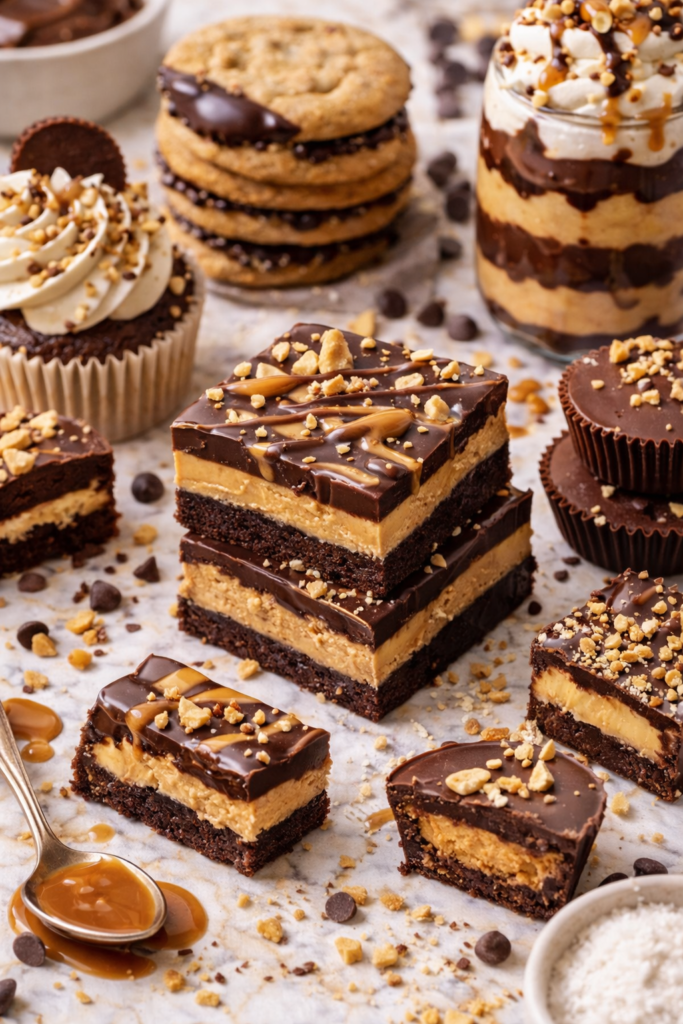
Fun Variations to Try
- Pretzel bottom: Swap half the graham crackers for crushed pretzels. The sweet-salty combo is unreal.
- Extra layer: Add a thin layer of salted caramel between the peanut butter and chocolate layers.
- Topping ideas: Flaky sea salt, crushed peanuts, mini M&Ms, or a white chocolate drizzle.
- Mini cups: Press the mixture into muffin tin liners instead of a baking pan for individual “cups.”
Make-Ahead Tips
These bars were practically designed to be made ahead.
- Up to 5 days in advance: Make and store in the fridge, covered tightly.
- Up to 3 months: Freeze individually wrapped bars in a zip-lock bag. Thaw in the fridge for a few hours before eating.
- For gifting: Stack bars in a small box lined with parchment and tie with twine. They look beautiful and hold up well.
Nutritional Breakdown
Here’s an approximate breakdown per bar (based on 24 servings):
| Nutrient | Per Bar |
|---|---|
| Calories | ~285 kcal |
| Total Fat | 18g |
| Saturated Fat | 7g |
| Carbohydrates | 28g |
| Sugar | 22g |
| Protein | 5g |
| Fiber | 1.5g |
Note: These values are estimates and will vary based on exact brands and portion sizes.
Diet Swaps
| Diet | What to Change |
|---|---|
| Vegan | Use vegan butter + dairy-free chocolate chips |
| Gluten-Free | Use certified GF graham crackers or GF digestive biscuits |
| Lower Sugar | Use sugar-free chocolate chips + reduce powdered sugar by ½ cup |
| Nut-Free | Swap peanut butter for sunflower seed butter |
Meal Pairing Suggestions
Honestly, these bars work for basically any occasion:
- Holiday cookie trays – they hold up for hours at room temp
- After-dinner dessert with a scoop of vanilla ice cream
- Paired with coffee or espresso – the bitterness cuts through the richness perfectly
- Afternoon snack with a glass of cold milk (classic for a reason)
Leftovers and Storage
Fridge: Store in an airtight container for up to 7 days. Layer bars with parchment paper so they don’t stick together.
Freezer: Wrap each bar individually in plastic wrap, then store in a freezer bag for up to 3 months. Thaw overnight in the fridge or at room temp for 30 minutes.
Room temp: These are fine out of the fridge for up to 2 hours at a party. After that, the chocolate layer softens. Not a disaster, just messier.
One thing to know: they taste even better on day two. The flavors meld together and the texture gets more fudgy. So if you can resist eating them all on day one, you’re in for a treat.
FAQ
Can I use crunchy peanut butter?
You can, but the base texture will be a bit more crumbly and harder to press flat. Creamy gives you that smooth, dense layer that holds together cleanly.
My chocolate cracked when I cut the bars. What did I do wrong?
You probably skipped the scoring step (or forgot it). Next time, score the chocolate layer after 30 minutes of chilling, before it’s fully set. That pre-lines the cuts and prevents cracking.
Can I make these in a smaller pan?
Yes. An 8×8 gives you thicker, chunkier bars. Just note that they’ll need slightly longer to chill through.
Do these need to stay refrigerated?
Yes, for the best texture and freshness. They’ll soften quickly at room temperature, especially in warm weather.
My base turned out too soft/crumbly. How do I fix it?
If it’s too soft: your butter may have been too warm, or you used natural peanut butter. Chill the base for 20 minutes before adding the chocolate layer.
If it’s too crumbly: add 1-2 tablespoons of melted butter and mix again.
Can I double the recipe?
Absolutely. Use two 9×13 pans or one large half-sheet pan.
Wrapping Up
If there’s one dessert I keep coming back to, it’s this one.
No oven. No mixer. No stress. Just a really, really good bar that tastes like someone put serious effort into it.
I genuinely think these are better than most chocolate peanut butter things you can buy at a store. The layers are thicker, the peanut butter is richer, and you can customize them exactly to your taste.
Make them this weekend. Bring them somewhere. Watch what happens.
And when you do, drop a comment below and let me know how they turned out. I’d love to hear what variations you tried, or if you have any questions. 👇


