Homemade vanilla ice cream is one of those things most people assume is complicated. It’s not.
It’s three main ingredients, one afternoon, and the kind of result that makes you wonder why you ever settled for the carton version. Real vanilla beans, actual egg yolks, heavy cream that smells like heaven — this is the version that ruins store-bought for you permanently. 🍦
And here’s the thing nobody tells you: the technique is basically foolproof once you understand what’s happening. This guide walks you through every step, including the parts most recipes skip over.
No ice cream machine? There’s a no-churn method in the substitutions section. Yes, it actually works.
What You’ll Need
Ingredients
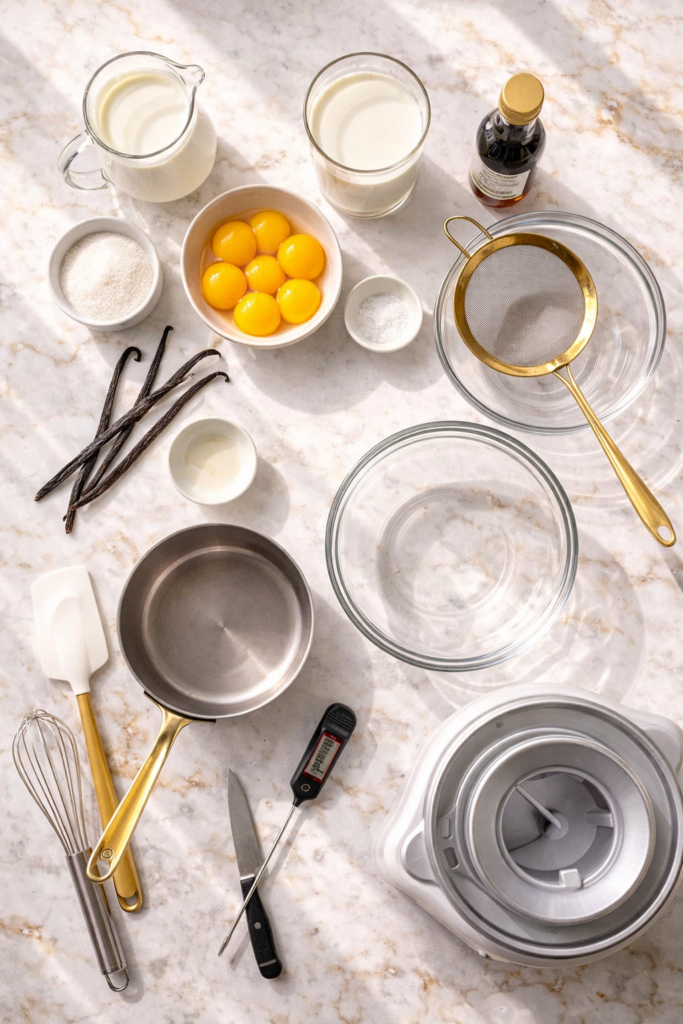
- 2 cups heavy cream
- 1 cup whole milk
- ¾ cup granulated sugar
- 5 large egg yolks
- 2 whole vanilla beans (or 2 tsp pure vanilla extract)
- ⅛ tsp fine sea salt
- 1 tsp pure vanilla extract (added after cooking)
Tools You’ll Need
- Ice cream maker (or loaf pan for no-churn method)
- Medium saucepan
- Mixing bowls (2 — one medium, one large)
- Fine mesh strainer
- Whisk
- Rubber spatula
- Paring knife (for splitting vanilla beans)
- Instant-read thermometer (highly recommended)
- Plastic wrap
- Airtight freezer container
Pro Tips
1
Temper your eggs slowly. Pour the hot cream into your yolks in a thin, steady stream while whisking constantly. Pour too fast and you’ll scramble the eggs. Too slow and you’ll be fine. There’s no such thing as going too slow here.
2
Use a thermometer for the custard. You want it to hit 170–175°F. That’s the sweet spot — fully cooked, silky, not curdled. Eyeballing it is a gamble you don’t need to take.
3
Chill the custard completely before churning. We’re talking cold — like refrigerator-overnight cold. A warm base going into the ice cream maker means longer churn time and icier texture. Patience here pays off enormously.
4
Salt is not optional. A pinch of sea salt makes the vanilla flavor pop in a way that’s hard to explain until you taste it side by side. Don’t skip it.
5
Press plastic wrap directly onto the surface of the custard while it chills. This prevents a skin from forming, which can create little bits of cooked egg protein in your final ice cream. Small step, big difference.
How to Make It
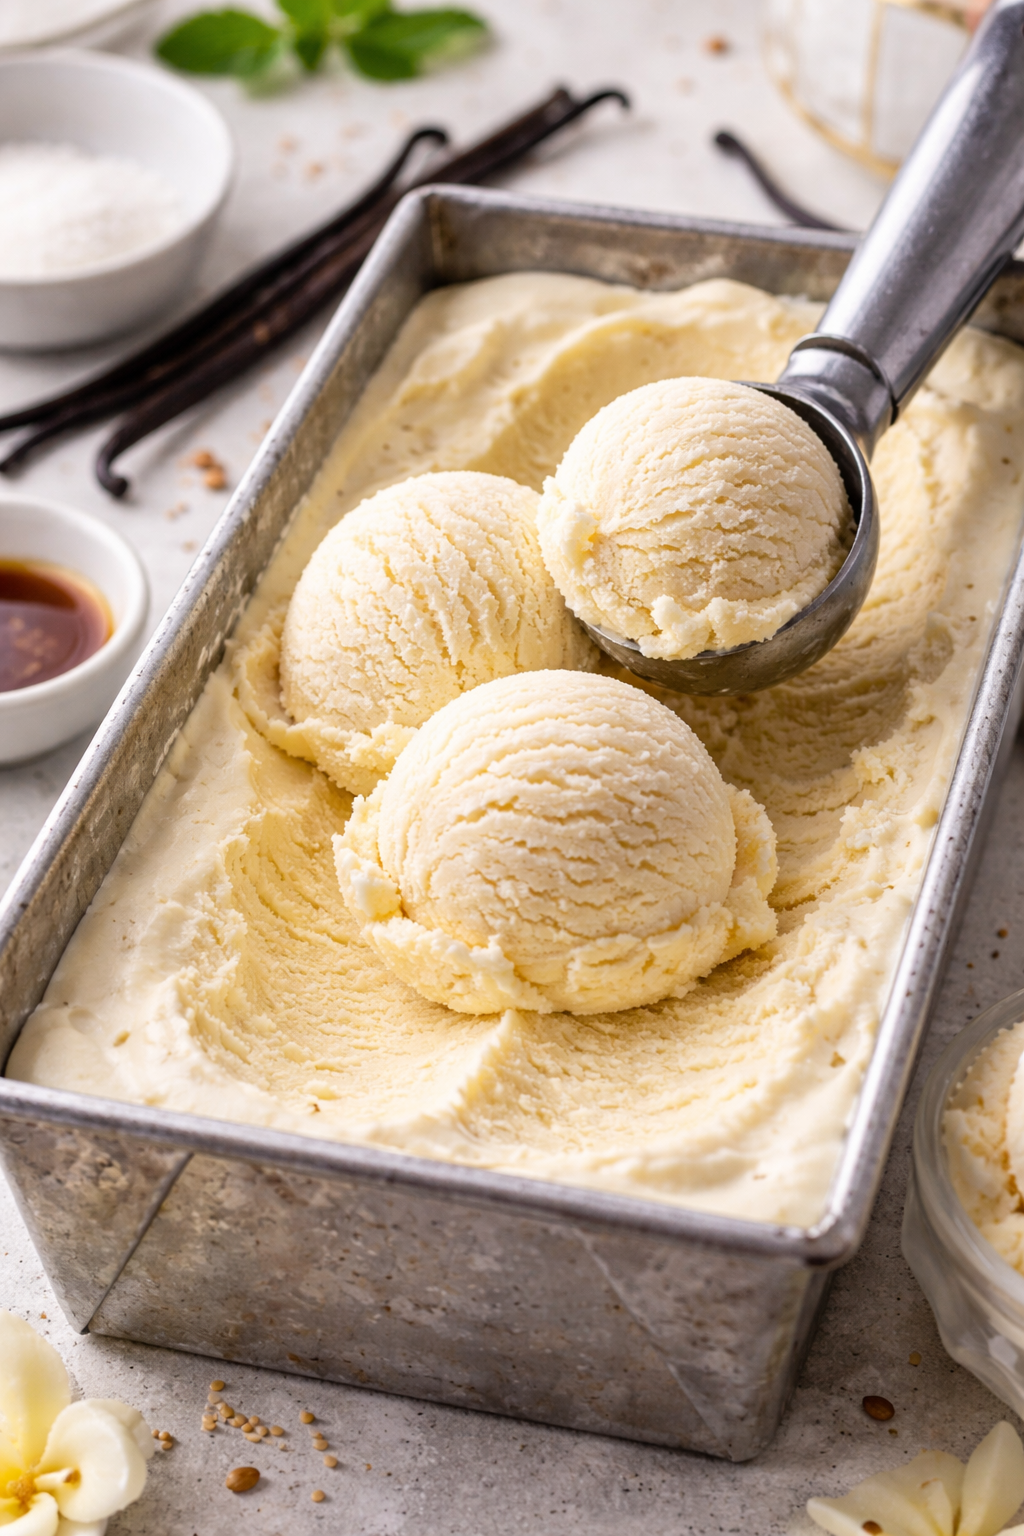
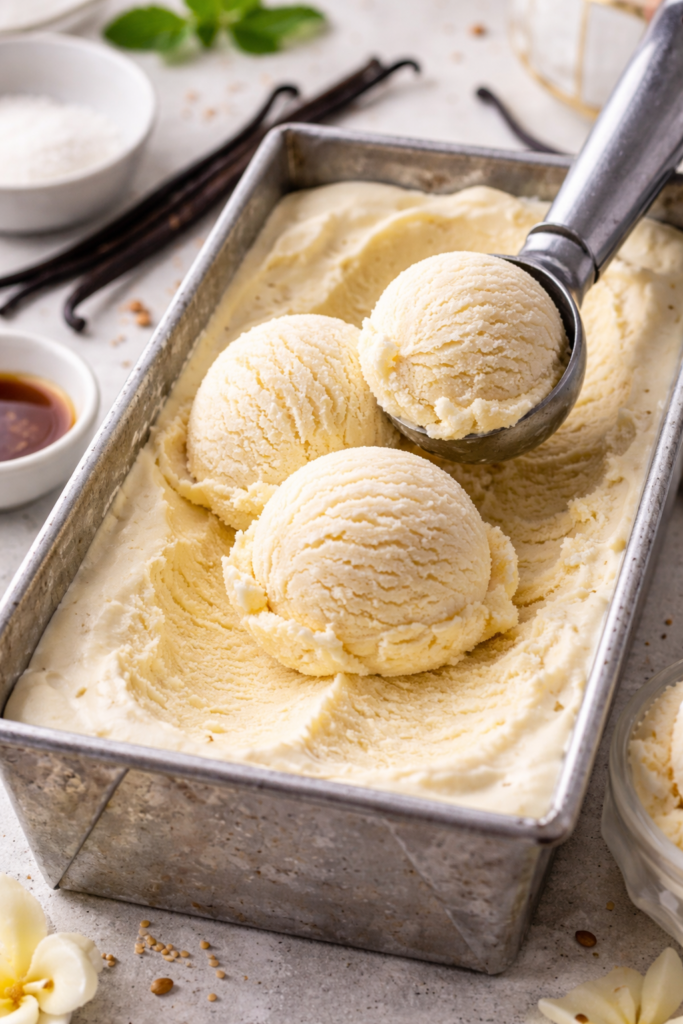
- Split and scrape your vanilla beans. Use a paring knife to slice each bean lengthwise. Scrape out the seeds (called “caviar”) with the back of the blade. Keep both the seeds and the pods — you’ll use them both.
- Warm the cream mixture. In a medium saucepan over medium heat, combine the heavy cream, whole milk, half the sugar (about 6 tbsp), vanilla bean seeds, and the pods. Heat until it just begins to steam — not boiling. Remove from heat.
- Whisk the yolks. In a medium bowl, whisk together the egg yolks and remaining sugar until the mixture turns pale and slightly thick, about 2 minutes.
- Temper the eggs. Very slowly pour about ½ cup of the warm cream mixture into the yolks while whisking constantly. Then pour in another ½ cup. Now pour the tempered yolk mixture back into the saucepan.
- Cook the custard. Return the saucepan to medium-low heat. Stir constantly with a spatula, scraping the bottom and sides. Cook until the custard thickens slightly and reaches 170–175°F — about 5 to 8 minutes. It should coat the back of a spoon.
- Strain and cool. Pour the custard through a fine mesh strainer into a large bowl. Discard the vanilla pods. Stir in the sea salt and the extra teaspoon of vanilla extract. Let it cool to room temperature.
- Chill the base. Press plastic wrap directly onto the surface of the custard. Refrigerate for at least 4 hours — overnight is ideal.
- Churn. Pour the cold custard into your ice cream maker and churn according to the manufacturer’s instructions. Most machines take about 20–25 minutes. The ice cream will look like soft-serve when done.
- Freeze until firm. Transfer to an airtight container, press plastic wrap on the surface again, and freeze for at least 2 hours before serving.
Substitutions and Variations
| Ingredient / Method | Swap or Variation | Notes |
|---|---|---|
| Whole milk | Half-and-half | Richer, creamier result |
| Heavy cream | Full-fat coconut cream | Makes it dairy-free; adds subtle coconut flavor |
| Egg yolks | 2 tbsp cornstarch | Egg-free version; slightly different texture |
| Granulated sugar | Honey or maple syrup | Use ½ cup; adds distinct flavor note |
| Vanilla beans | 2 tsp vanilla bean paste | Great substitute, still shows the specks |
| Ice cream maker | No-churn method (see below) | Whip 2 cups cream to stiff peaks, fold into sweetened condensed milk + vanilla, freeze 6 hrs |
Make Ahead Tips
- The custard base can be made up to 3 days ahead and stored in the fridge (with plastic wrap on the surface).
- Fully churned ice cream keeps well in the freezer for up to 2 weeks at peak quality.
- For longer storage (up to 3 months), transfer to a deep, airtight container and press foil directly against the surface before sealing.
Nutritional Breakdown
| Per Serving (approx. ½ cup) | Amount |
|---|---|
| Calories | ~280 kcal |
| Fat | 20g |
| Carbohydrates | 22g |
| Protein | 4g |
| Sugar | 20g |
Diet-Friendly Swaps
- Dairy-free: Use full-fat coconut cream + oat milk, and check your vanilla extract is dairy-free.
- Lower sugar: Swap half the sugar for allulose — it freezes similarly and doesn’t leave that cooling aftertaste that erythritol does.
- Egg-free: The cornstarch method works well and keeps the creamy texture.
Meal Pairing Suggestions
- Warm apple or peach crumble
- Freshly baked brownies (still warm from the oven)
- Waffles or crepes with caramelized bananas
- A strong shot of espresso poured over the top — yes, affogato-style
Leftovers and Storage
- Store in an airtight container with plastic wrap pressed directly on the surface to prevent ice crystals.
- Keep at the back of the freezer, not in the door — temperature fluctuations ruin texture fast.
- If the ice cream gets too hard to scoop, let it sit at room temperature for 5 minutes before serving.
- Best consumed within 2 weeks. After that it still tastes fine, but ice crystals start forming on top.
- Never refreeze ice cream that has fully melted — the texture becomes grainy and the safety factor is questionable.
FAQ
Do I have to use vanilla beans, or can I just use vanilla extract?
Extract works perfectly fine. Use 2 teaspoons in the custard instead of the beans. If you want the visual specks but not the price tag of whole beans, vanilla bean paste is a great middle ground.
My custard curdled. What happened?
The heat got too high, too fast. Scrambled egg proteins in the custard. You can try blending it smooth with an immersion blender and straining carefully — it sometimes saves it. Going forward, keep the heat at medium-low and stir constantly.
Why does my ice cream turn rock solid in the freezer?
Home freezers run colder than commercial ones, so homemade ice cream always freezes harder. The fix: add 1–2 tablespoons of vodka to the base before churning. Alcohol doesn’t freeze, so it keeps things scoopable. You won’t taste it at all.
Can I make this without an ice cream maker?
Yes. Whip 2 cups of heavy cream to stiff peaks. Fold in one can of sweetened condensed milk and 2 teaspoons of vanilla extract. Pour into a loaf pan, cover with plastic wrap, and freeze for 6 hours. It won’t have quite the same silky texture, but it’s genuinely good.
How do I know the custard is thick enough?
The classic test: drag your finger across the back of the spoon. If the line holds clean and doesn’t run, the custard is ready. If you have a thermometer, 170–175°F is your target.
Can I double the recipe?
Yes, but churn in two separate batches. Overloading the ice cream maker extends churn time and produces uneven texture. The custard itself can be made in double quantity and stored in the fridge.
Wrapping Up
Making vanilla ice cream from scratch the first time feels like a small kitchen milestone.
You’ll make the custard, smell the vanilla blooming in warm cream, watch it thicken on the stove — and when you finally scoop into that first bowl, the difference from the carton version is genuinely shocking.
That’s the thing about real vanilla ice cream. It’s not just a flavor. It’s proof that simple ingredients, done right, beat everything else on the shelf.
Give this a try and drop a comment below — especially if you tried the no-churn method or made any fun swaps. And if you have questions at any step, ask away. 👇


