You put out a sundae bar at your next gathering and watch what happens.
People who were standing in the corner with their arms crossed? Suddenly very interested in life. Kids? Completely feral in the best way possible. Adults? Acting like kids.
A DIY sundae bar is one of those things that looks impressive, tastes incredible, and takes almost zero culinary skill to pull off. It’s all about the setup.
And once you know the formula, you’ll want to set one up for every occasion — birthdays, summer nights on the porch, a random Tuesday that deserves to be better than it started.
Quick heads up: this guide covers everything from the base scoops to the toppings, the setup tips that make it look like you planned for weeks, and a few things that will genuinely surprise you about how much the little details matter.
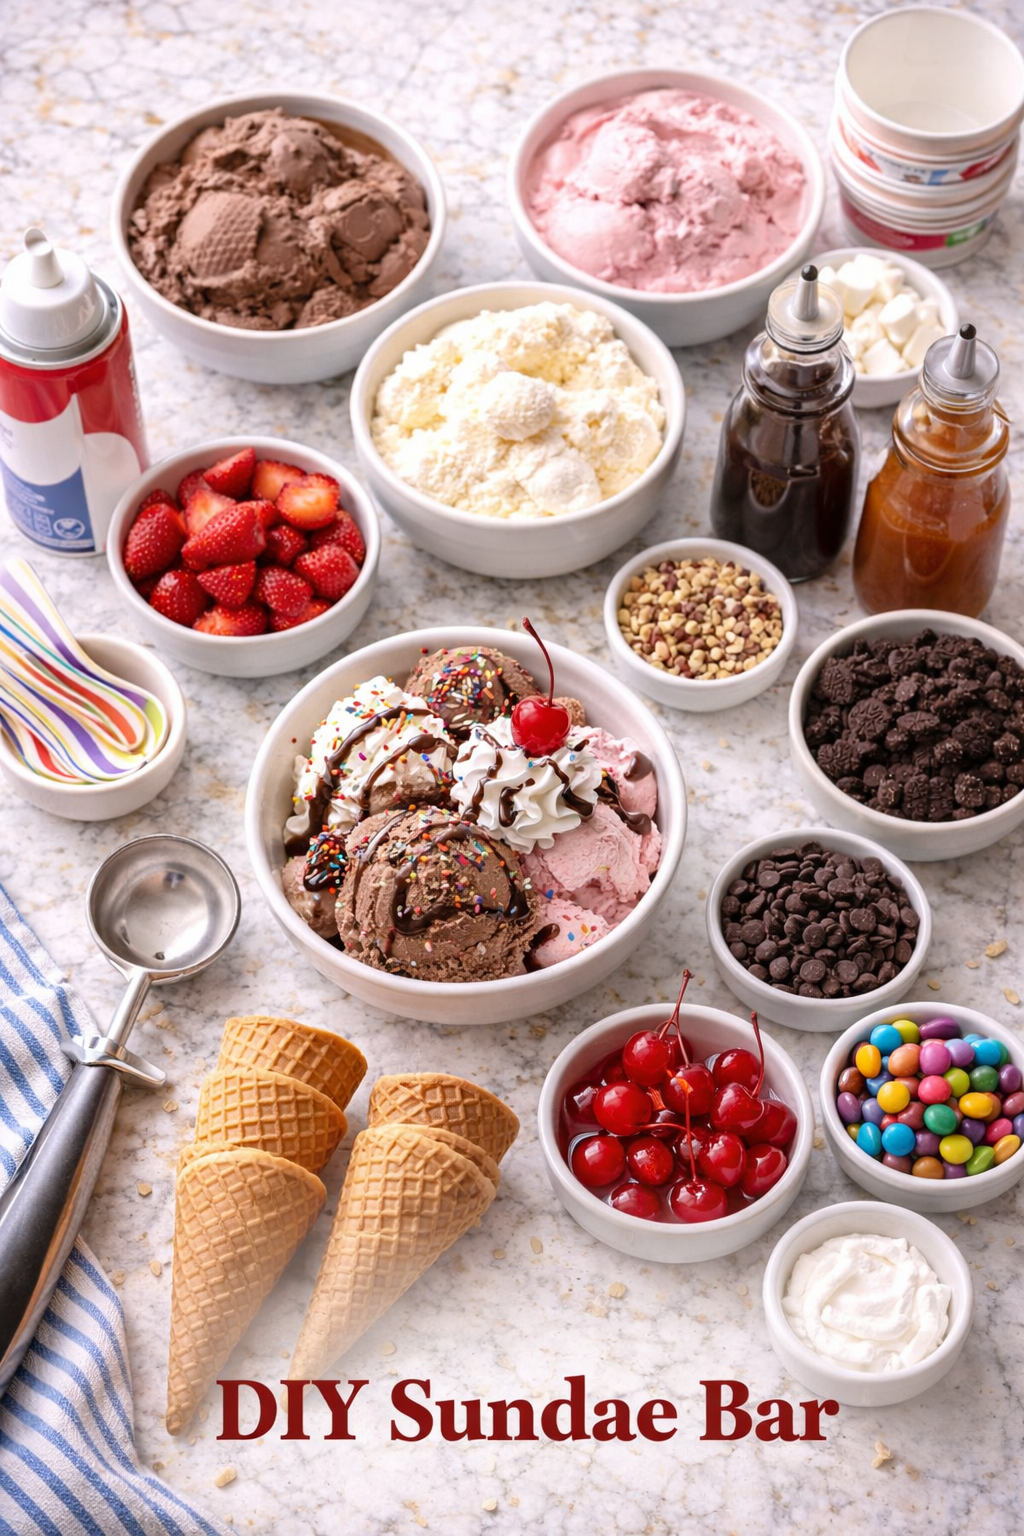
What You’ll Need
Ice Cream Bases (Pick 3-5)
- 1.5 quarts vanilla bean ice cream
- 1.5 quarts chocolate fudge ice cream
- 1.5 quarts strawberry ice cream
- 1 quart salted caramel ice cream (the surprise fan favorite)
- 1 quart cookies and cream ice cream
Sauces
- 1 jar (12 oz) hot fudge sauce
- 1 jar (12 oz) caramel sauce
- 1 jar (12 oz) strawberry sauce
- 1 cup rainbow sprinkle mix
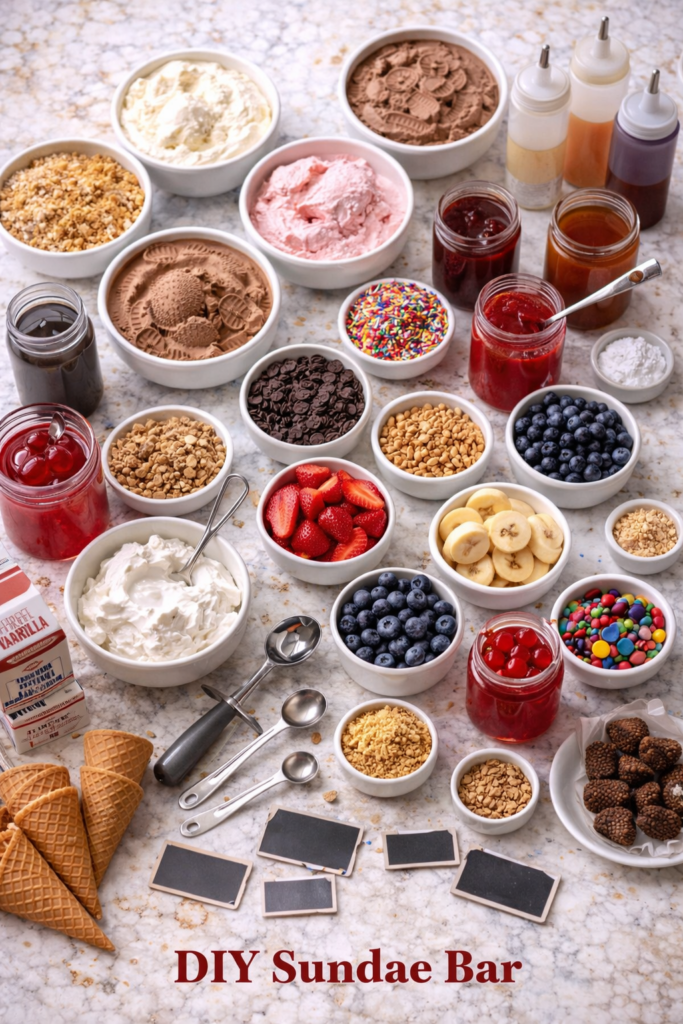
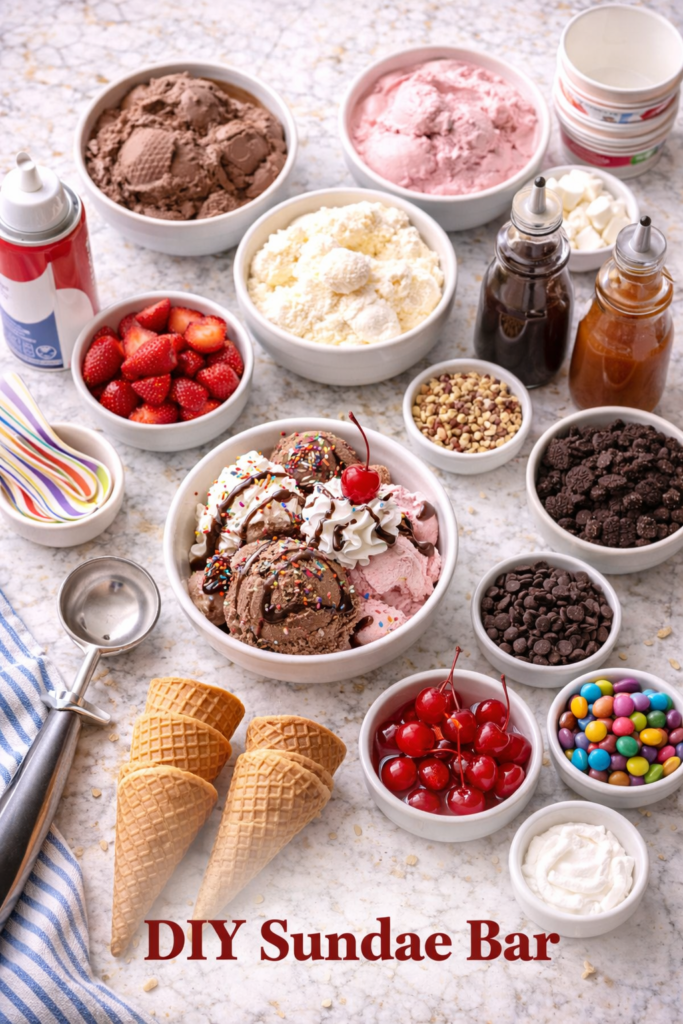
Toppings
- 1 cup crushed Oreo cookies
- 1 cup mini chocolate chips
- 1 cup chopped salted peanuts or mixed nuts
- 1 cup mini marshmallows
- 1 cup fresh sliced strawberries
- 1 cup fresh blueberries
- 1 cup sliced bananas
- 1 cup maraschino cherries
- 1 cup brownie bites (store-bought is totally fine)
- 1 cup crushed graham crackers
- 2 cups heavy whipping cream (for fresh whipped cream)
- 2 tbsp powdered sugar
- 1 tsp pure vanilla extract
- 1 cup granola
- Waffle cones and/or waffle bowls for serving
Tools You’ll Need
- Ice cream scoop (sturdy, not flimsy)
- Stand mixer or hand mixer (for whipped cream)
- Small to medium serving bowls (10–15 total)
- Sundae cups, bowls, or waffle cones for guests
- Small ladles or spoons for sauces
- Squeeze bottles (optional but game-changing for sauces)
- Mini tongs for toppings
- Chalkboard labels or small tent cards
- A large cooler or second freezer space to keep ice cream cold until serving
- Ice cream storage containers
Pro Tips 🍨
- Soften the ice cream slightly before serving. Pull it from the freezer 5–8 minutes before guests serve themselves. Scooping rock-hard ice cream is frustrating and you’ll end up with sad, crumbly scoops instead of beautiful round ones.
- Warm your sauces. Cold hot fudge poured over ice cream is not hot fudge — it’s a clump. Microwave sauces in 20-second increments and pour them into a small pitcher or squeeze bottle right before the bar opens.
- Make the whipped cream last. Whip it fresh right before serving. It holds for about 30–45 minutes before it starts to lose structure. Make it too early and you’ll get a sad, deflated situation.
- Set up a “combo suggestion” card. Write 2–3 flavor combo ideas (like “Salted Caramel + Hot Fudge + Crushed Pretzels”) on a chalkboard near the bar. People love being inspired, especially kids who would otherwise put every single topping on and regret nothing.
- Keep the fruit cold. Sliced strawberries and bananas go sad and brown quickly at room temperature. Set the fruit bowls on a tray of crushed ice to keep them fresh for longer.
How to Make Fresh Whipped Cream
Store-bought whipped cream in a can is fine. But fresh whipped cream? That’s the thing people talk about at brunch the next day.
It takes four minutes.
- Pour 2 cups of cold heavy whipping cream into a chilled mixing bowl.
- Add 2 tablespoons of powdered sugar and 1 teaspoon of vanilla extract.
- Beat on medium-high speed until soft peaks form, about 3–4 minutes. Watch it closely — over-whipped cream turns grainy and sad.
- Spoon into a serving bowl and refrigerate until the bar is ready to open.
How to Set Up Your Sundae Bar
The setup matters more than you think. A disorganized bar with no labels turns into chaos. An organized one with clear sections makes guests feel like they’re at an actual ice cream shop.
- Set your ice cream station first.Arrange 3–5 cartons in a row, with a large scoop next to each one. Keep a small cup of warm water nearby to rinse the scoop between flavors.
- Place sauces next to the ice cream.Warm them and transfer to small pitchers or squeeze bottles. Label each one. (“Hot fudge” and “caramel” look identical when you’re hungry — trust me.)
- Arrange toppings in small bowls in a half-circle.Group them loosely: fruits together, candies together, crunchy things together. It helps guests build a more intentional sundae instead of just dumping random things on.
- Put whipped cream and cherries at the very end.These are the “finishing touches” and positioning them last naturally guides people to add them as a final step.
- Stack cups and cones at the very beginning of the barso guests pick them up first and move down the line.
- Label everything.Yes, even the obvious things. It makes the bar look polished, it helps people with allergies, and honestly — it just looks really good.
Substitutions and Variations
| Swap This | For This | Why |
|---|---|---|
| Dairy ice cream | Oat milk or coconut milk ice cream | Vegan/lactose-free guests |
| Caramel sauce | Vegan caramel (dates + coconut cream) | Dairy-free option |
| Regular whipped cream | Coconut cream (chilled overnight) | Dairy-free, equally delicious |
| Maraschino cherries | Fresh bing cherries | Less sugar, more flavor |
| Salted peanuts | Sunflower seeds | Nut-free option |
| Brownie bites | Gluten-free brownies | Gluten-free guests |
| Waffle cones | GF waffle cups | Gluten-free option |
Fun Theme Variations
- Mexican Hot Chocolate Bar: Add a spicy chocolate sauce (dark chocolate + cayenne), churro pieces, and cinnamon sugar as toppings.
- Tropical Bar: Swap sauces for mango coulis and passion fruit curd, add toasted coconut and fresh pineapple.
- S’mores Bar: Lean into graham crackers, toasted marshmallows, and dark chocolate shards for a campfire-inspired version.
- Birthday Cake Bar: Funfetti cake pieces, birthday cake ice cream, and an extra generous sprinkle station.
Make-Ahead Tips
Good news: almost all of this can be prepped the day before.
- Prep all toppings 24 hours ahead. Crush the Oreos, chop the nuts, make brownie bites — store each in airtight containers.
- Make sauces up to 3 days ahead. Store in mason jars in the fridge and reheat right before serving.
- Slice bananas and strawberries last minute. These two in particular brown fast. Cut them 30 minutes before guests arrive.
- Set up the bar layout the night before (minus the perishables). Place all the bowls, label them, arrange the tools. Morning-of setup becomes a 10-minute job.
Nutritional Breakdown
One “average” sundae with two scoops of ice cream, one sauce, two to three toppings, and whipped cream falls somewhere in the range of:
| Nutrient | Approx. Amount |
|---|---|
| Calories | 450–700 kcal |
| Total Fat | 22–35g |
| Sugar | 50–75g |
| Protein | 6–10g |
| Carbohydrates | 60–85g |
Using a lighter ice cream base (like a frozen yogurt or oat milk version), fresh fruit toppings, and skipping extra candy toppings can bring this down to the 300–400 kcal range. But honestly — it’s a sundae. Enjoy it.
Meal Pairing Suggestions
- Serve after a light summer grill meal (burgers, chicken skewers) to balance the richness
- Pairs perfectly with lemonade, iced coffee, or a cold sparkling water with citrus
- For a brunch version, a waffle bar and sundae bar side by side? Absolute chaos. The good kind.
Leftovers and Storage
- Ice cream: Return lids immediately after the bar. Ice cream left out for more than 20 minutes starts to degrade in texture. If partially melted, it can be refrozen but the texture will suffer.
- Toppings: Most dry toppings (crushed cookies, nuts, sprinkles, marshmallows) keep in airtight containers for up to a week at room temperature.
- Fresh fruit: Store leftover fruit in the fridge and use within 2 days. Bananas won’t survive past day one.
- Whipped cream: Use within the same day. It does not store well once whipped.
- Sauces: Refrigerate leftover sauces for up to 2 weeks. They’re great drizzled on pancakes, brownies, or just… eaten by the spoon.
FAQ
How far in advance can I set up the sundae bar?
You can set up all the dry toppings, tools, bowls, and labels the night before. Sauces can be made up to 3 days ahead. The ice cream, fresh fruit, and whipped cream should only go out 10–15 minutes before guests arrive.
How much ice cream do I need per person?
Plan for about 2–3 scoops per person (roughly 1/2 to 3/4 cup per serving). For 10 guests, 3–4 quarts total gives you enough without running out. If you’re serving kids, they tend to go back for seconds, so err on the generous side.
What’s the best way to keep ice cream from melting too fast?
Nestle the cartons inside a larger bowl or tray filled with crushed ice. This keeps them cold for about 30–45 minutes at room temperature. Alternatively, set them up in batches — keep one or two cartons out at a time and rotate from the freezer.
Can I do this for a large group?
100%. A sundae bar actually scales beautifully — you just add more toppings and ice cream cartons. For 20+ people, set up two identical stations side by side to cut down on line congestion.
What if I don’t have small bowls for every topping?
Raid your kitchen for anything that works: ramekins, mason jars, coffee mugs, small plates. The mismatched look can actually make the bar look more charming and intentional, like a vintage ice cream parlor.
Are store-bought sauces okay?
Completely fine. Warming them up makes a huge difference and it’s honestly hard to tell the difference between a warmed jarred hot fudge and a homemade one. Smuckers hot fudge warmed in a small saucepan is better than cold homemade fudge every single time.
How do I handle guests with dietary restrictions?
Label everything clearly and keep dairy-free/vegan options in a separate, distinct section of the bar. This makes it easy for guests to navigate without having to ask. A small card that says “vegan-friendly options” with an arrow does the job perfectly.
Wrapping Up
A DIY sundae bar costs less than a restaurant dessert for your whole group combined, takes almost no cooking skill, and creates the kind of moment people actually remember.
It’s not fancy. It doesn’t need to be. It just needs to be fun, generous, and set up with a little thought.
Use this guide and you’ll have a bar that looks like you spent way more time on it than you did. Your guests will be stacking sauces, debating topping combinations, and sneaking back for a second round before you even sit down.
Give it a try and then come back and tell me how it went. Drop a comment below with the flavors you used, the toppings that surprised everyone, or any questions you ran into along the way. 👇


